Reduce Churn with Intercom
Prevent churn by syncing Upollo Churn Scores to Intercom
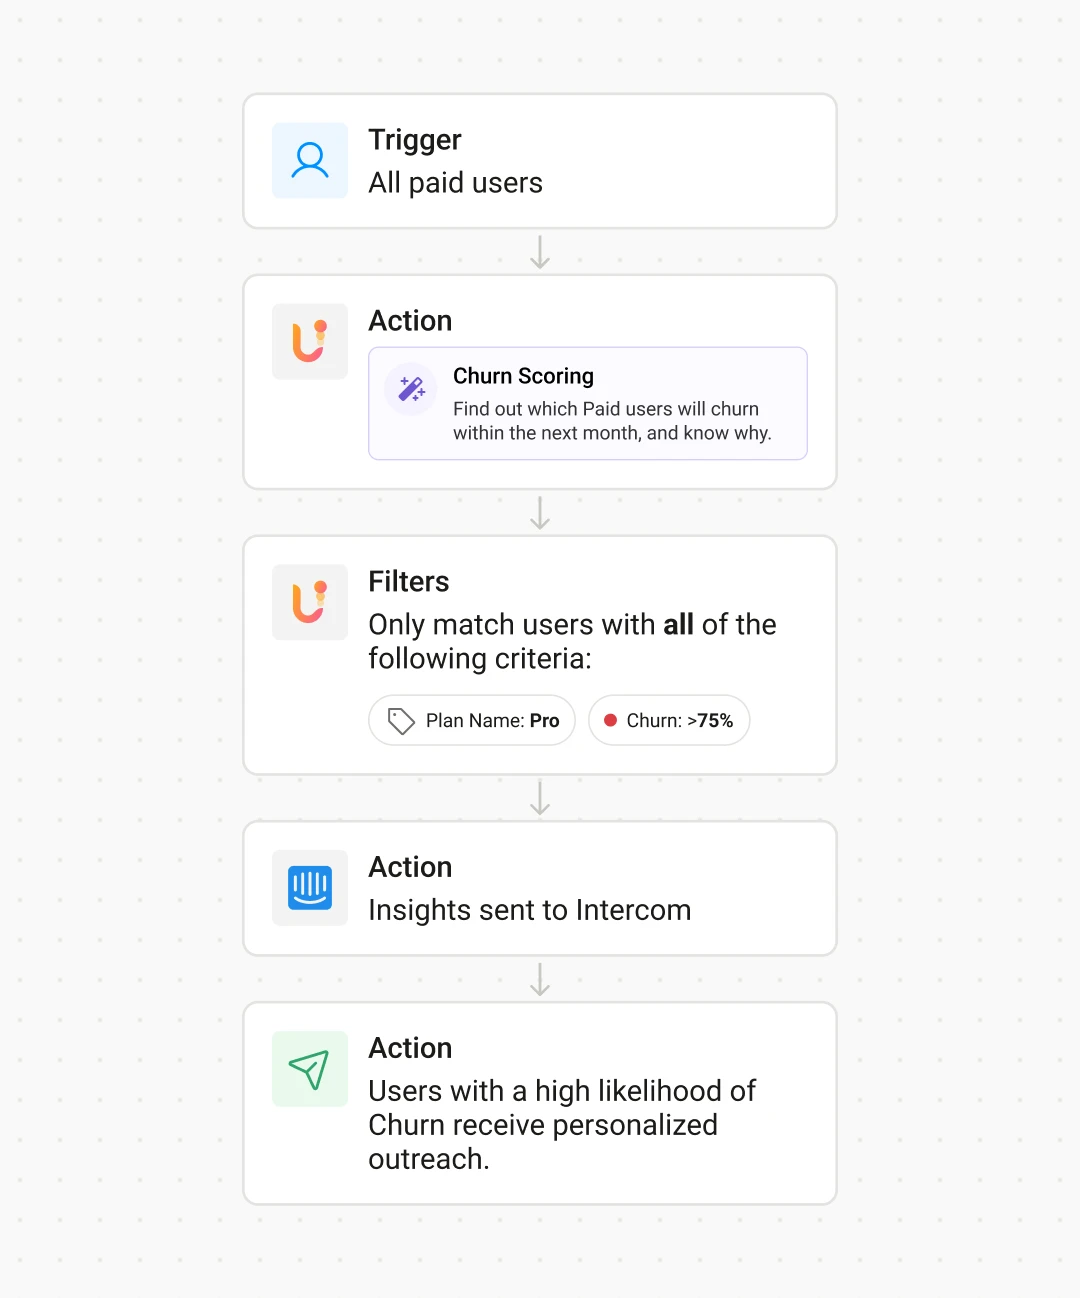
What this Play does:
This Play automatically syncs Upollo’s Churn Scores to your Intercom account, allowing you to proactively engage with at-risk customers, improving your retention rates and preventing churn.
Please note, the direct sync with Intercom is only available to enterprise accounts. Contact us to get this enabled on your account.
Requirements:
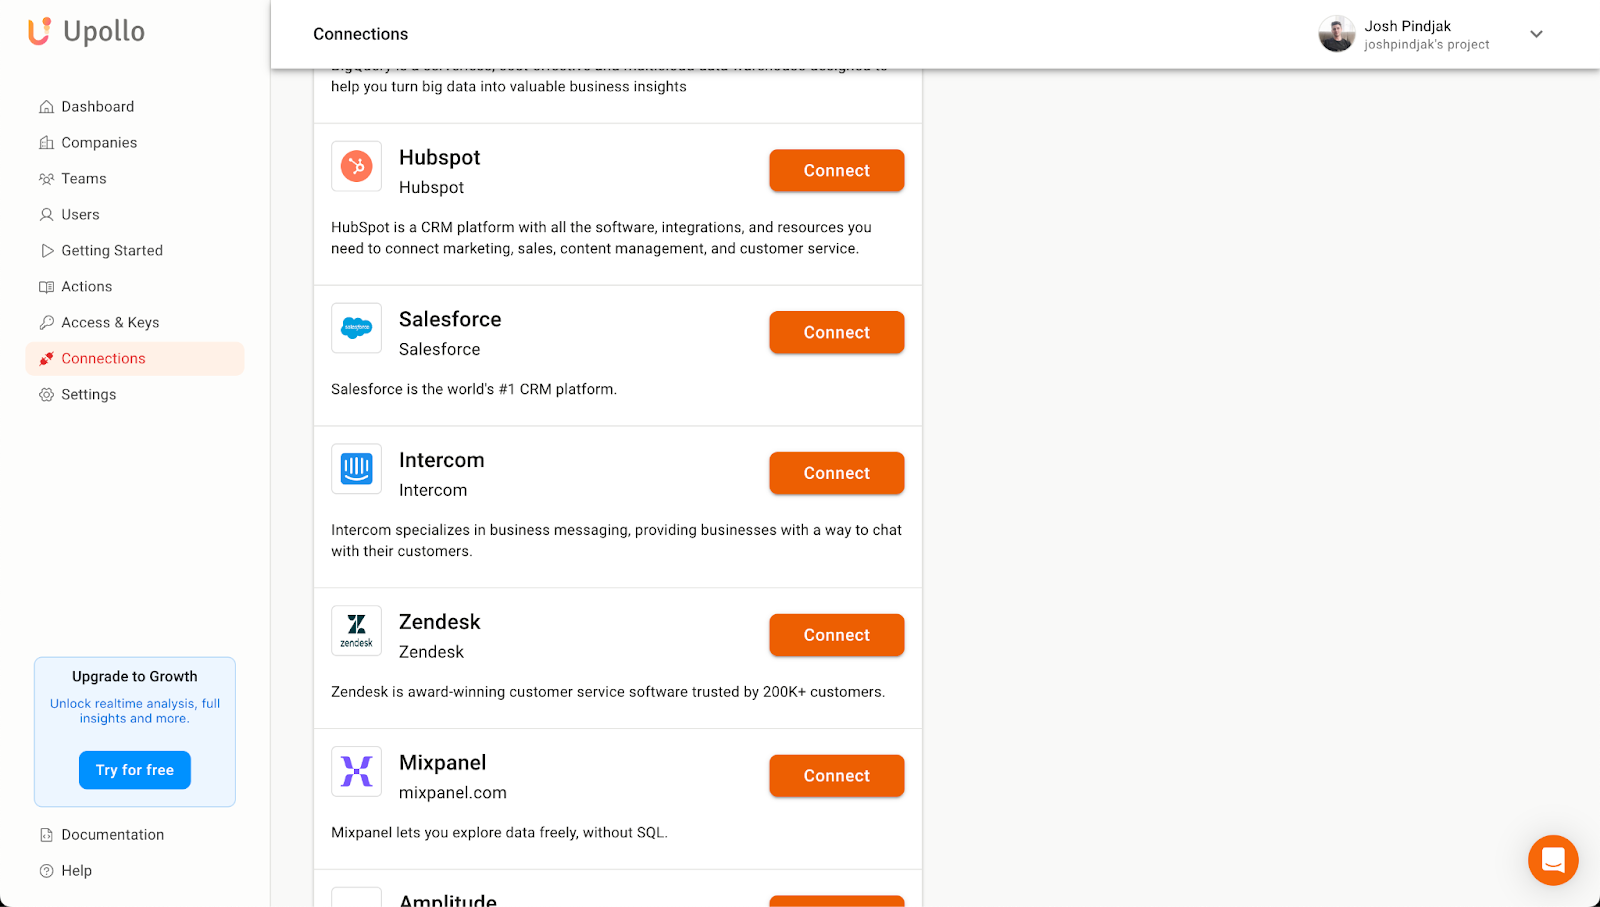
For this Play to work, you should have the following accounts set up:
- Upollo Account: Upollo brings together all of your customer data (App/Website, Billing/Subscription, CRM, Customer Support) to provide insights and predictions for Conversion, Churn/Retention, and Expansion. Get started for free.
- Intercom Account: For sending emails to your users. You can use a different email provider - this Play will use Intercom as a way to send emails to users based on custom criteria. This Play assumes you’ve already set up your domain via the Intercom documentation.
Here’s an overview of how we’ll be moving data between Upollo and these other tools throughout this Play.
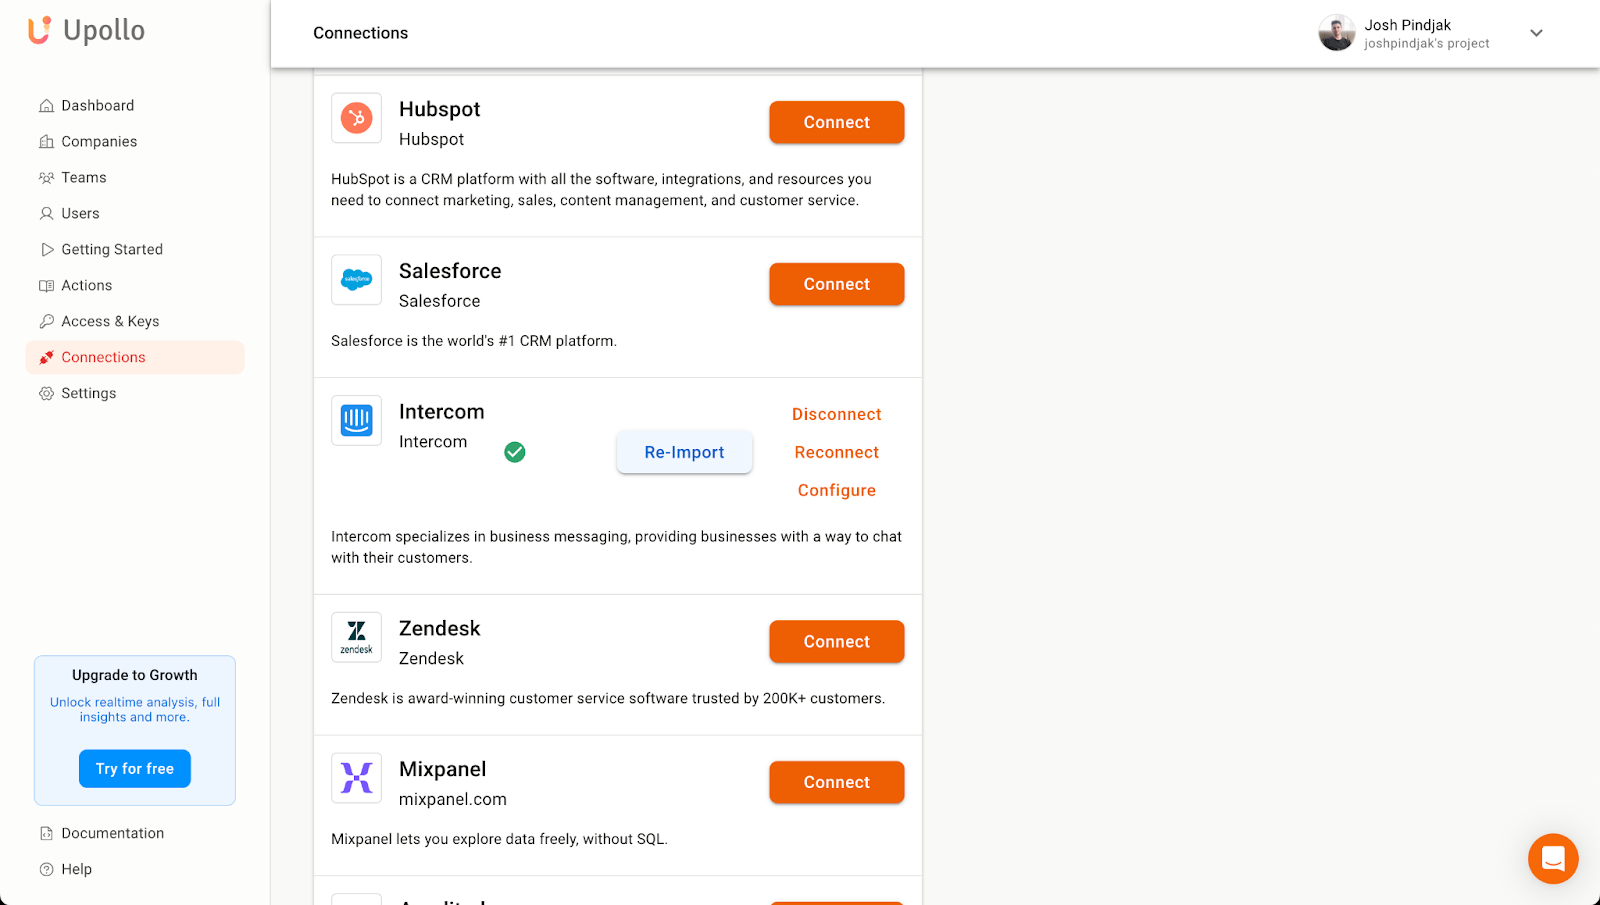
In Upollo, go to the Connections page and find Intercom. Click the Connect button.
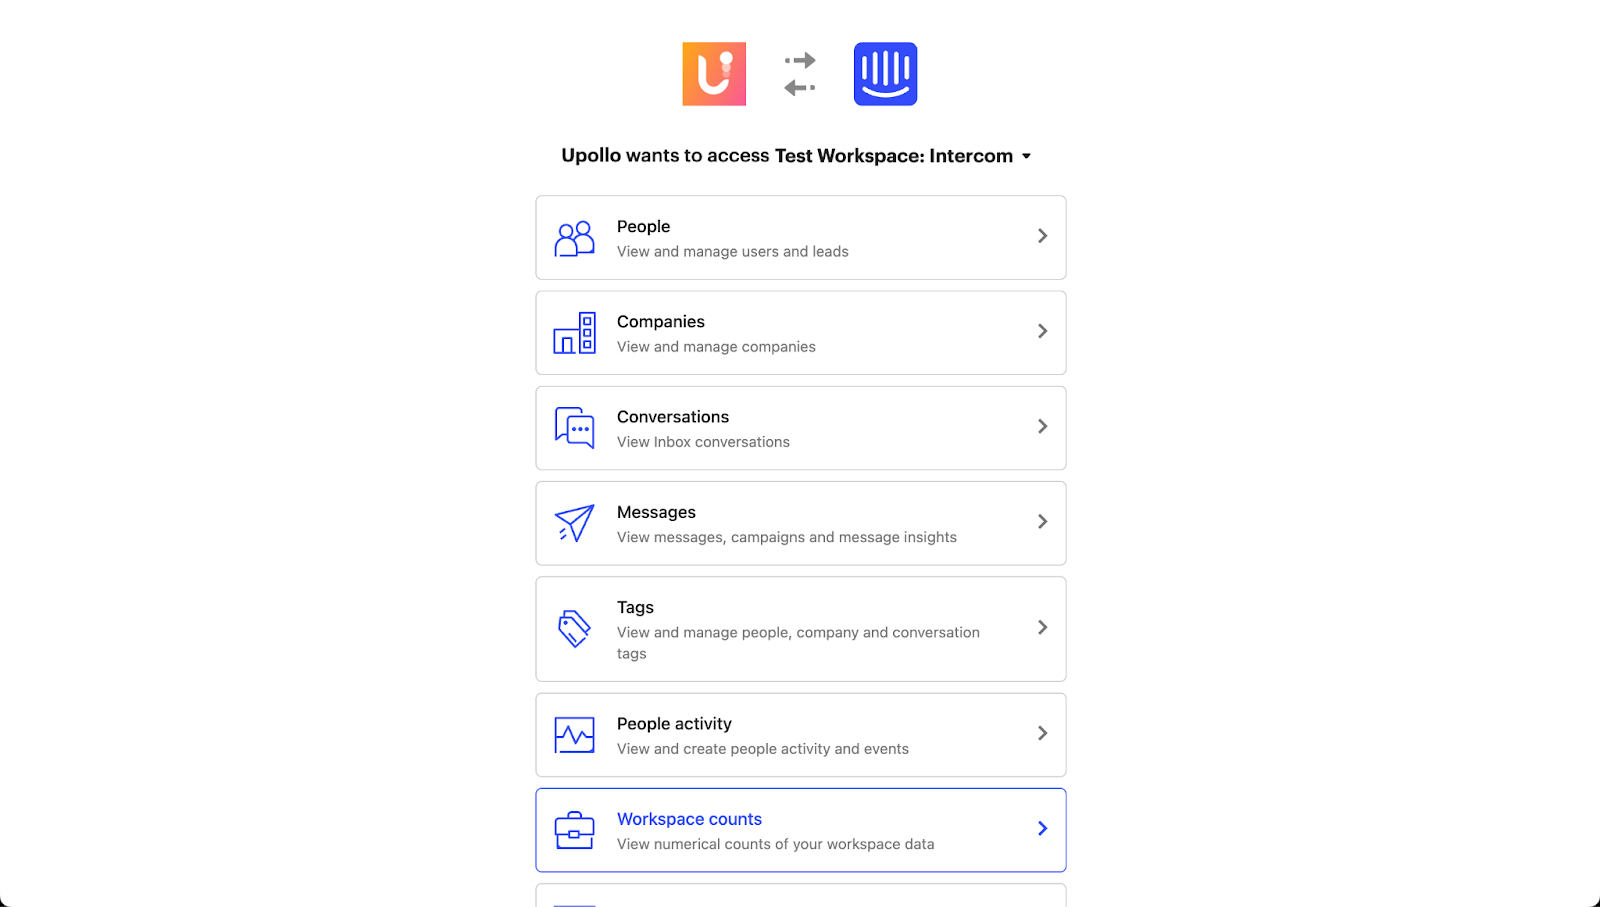
You’ll be prompted to authenticate your Intercom account and authorize the connection to Upollo. Review the settings on this page and click the green Connect button at the bottom.
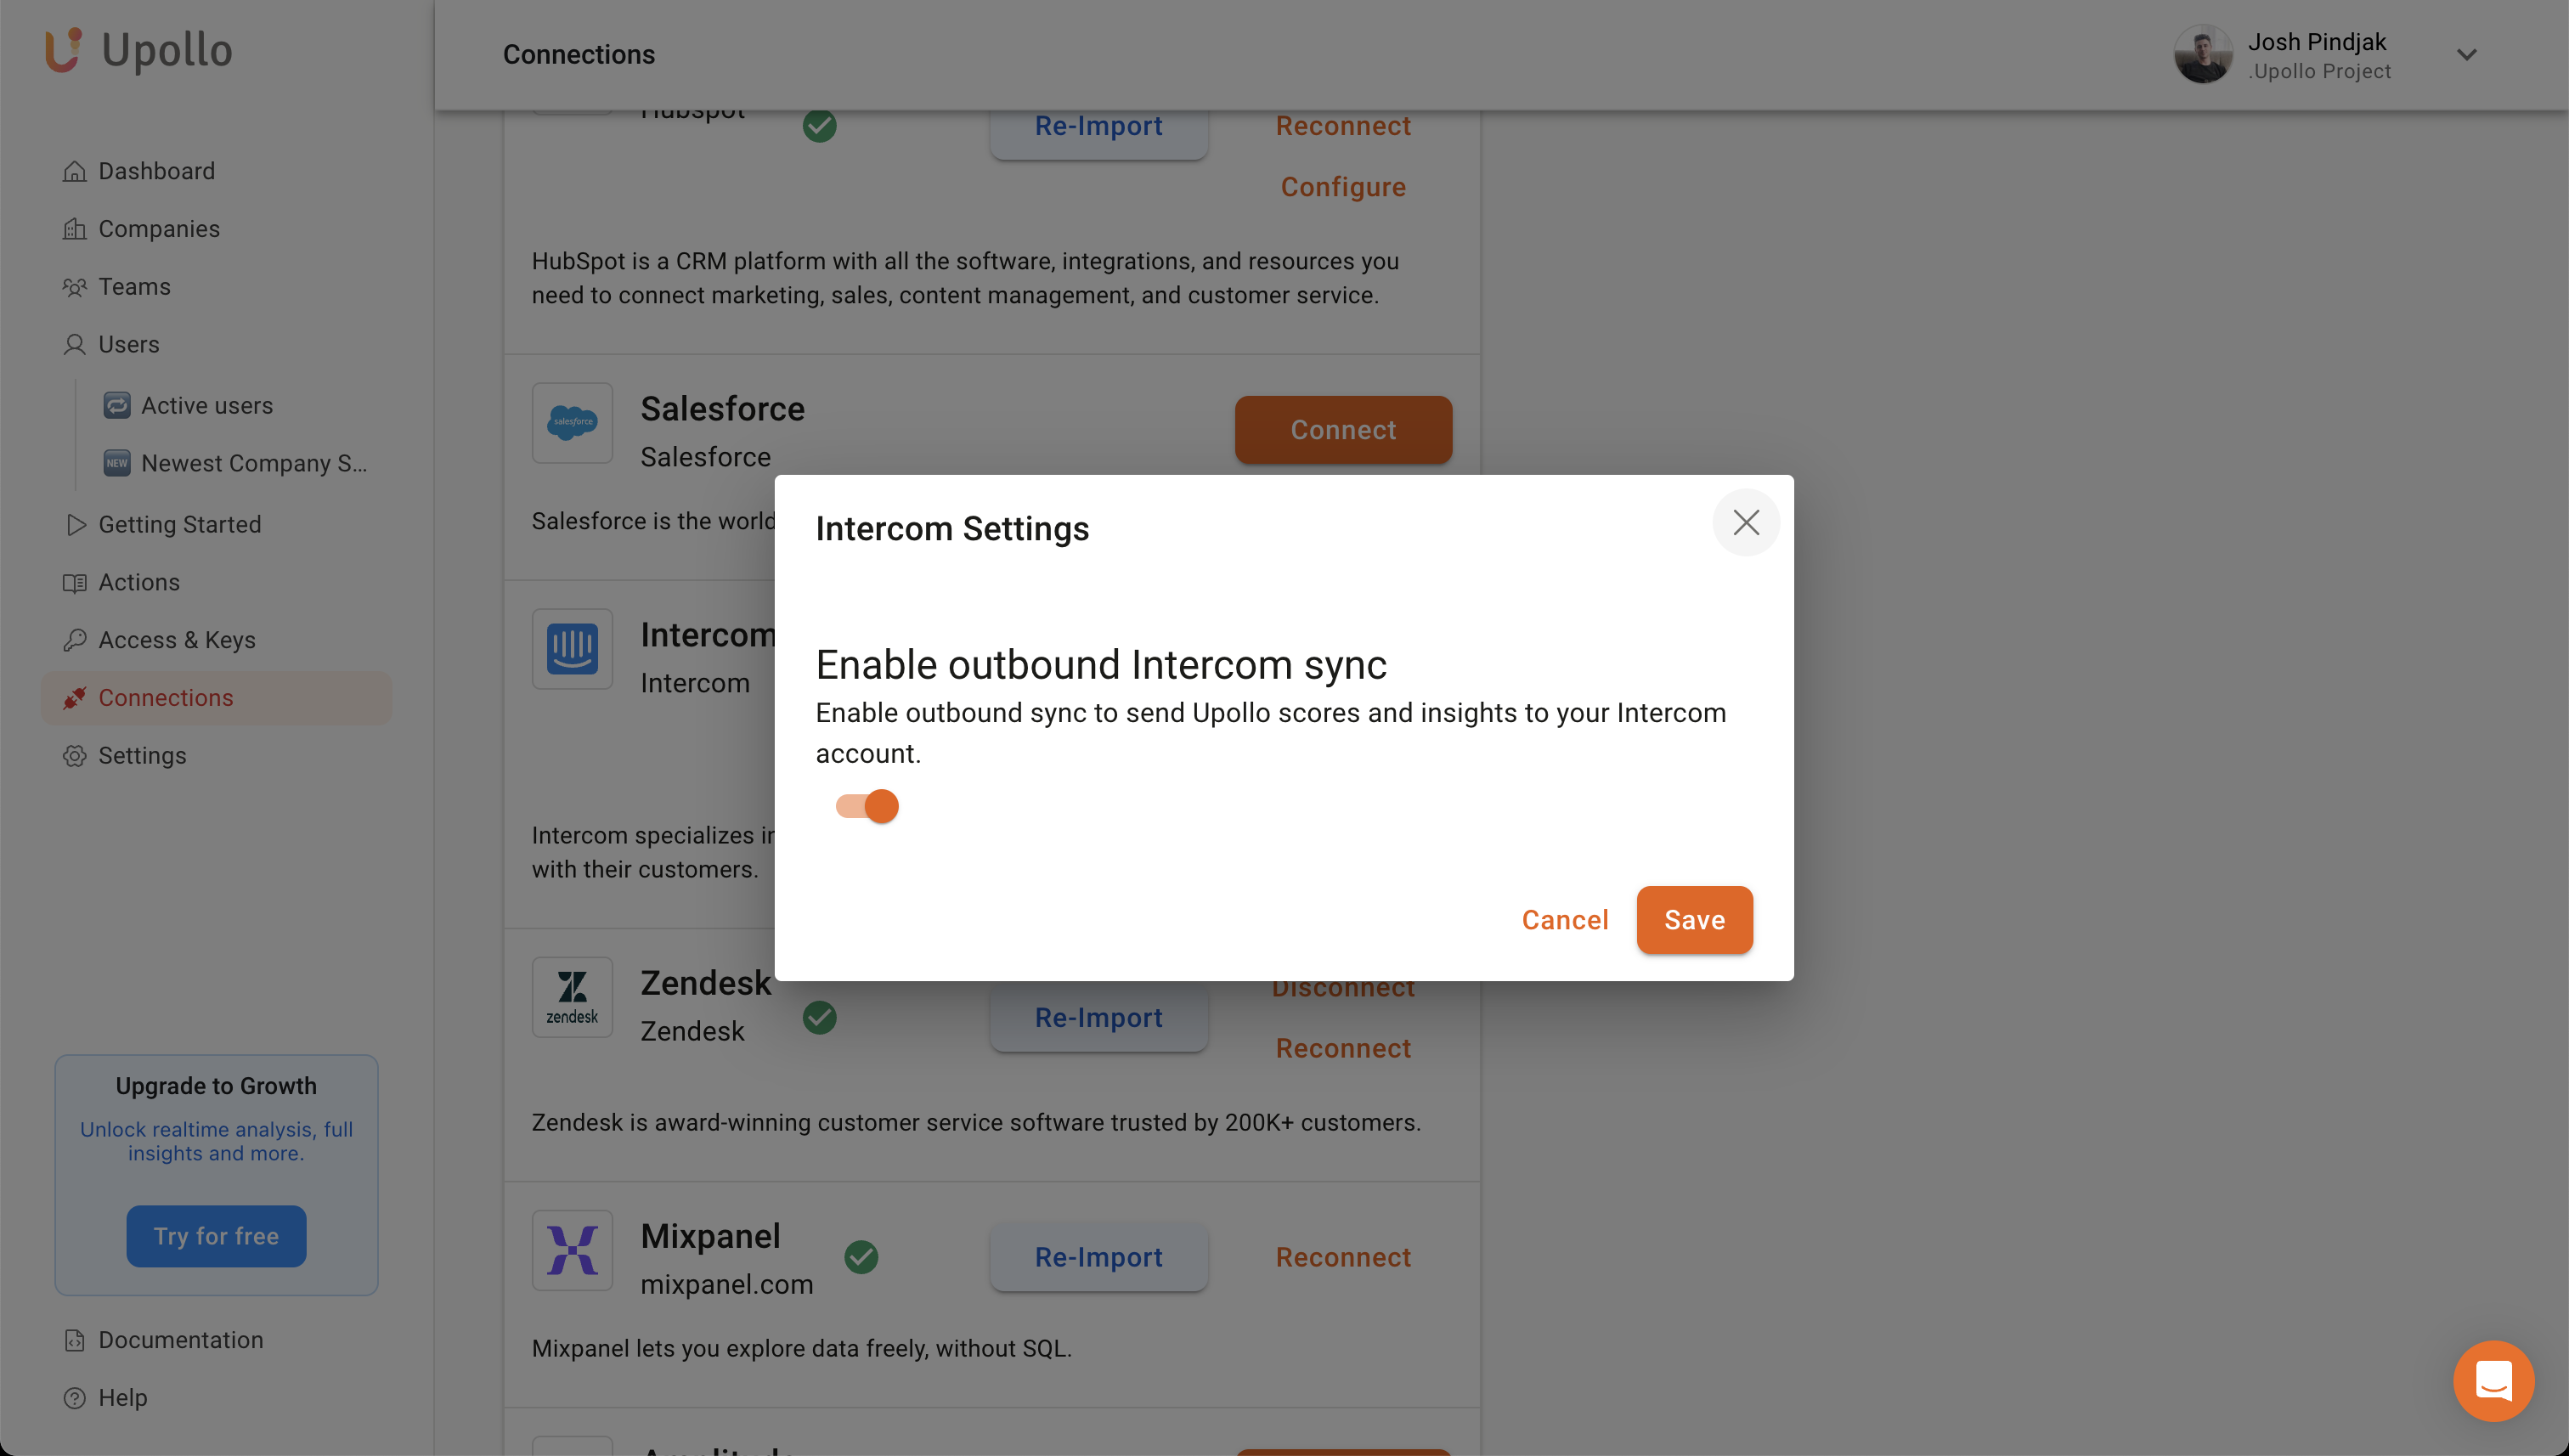
Once completed, you’ll be redirected back to Upollo. In Upollo, go back to the Connections page, find Intercom and click Configure.
In the section Enable outbound Intercom sync, turn the switch to the ON position. Please note, this is only available to enterprise accounts. Contact us to get this enabled on your account.
After enabling the Outbound Intercom Sync, events from Segment are sent automatically to Intercom, along with additional traits about each user, for example their Churn rate, Conversion rate, and so on.
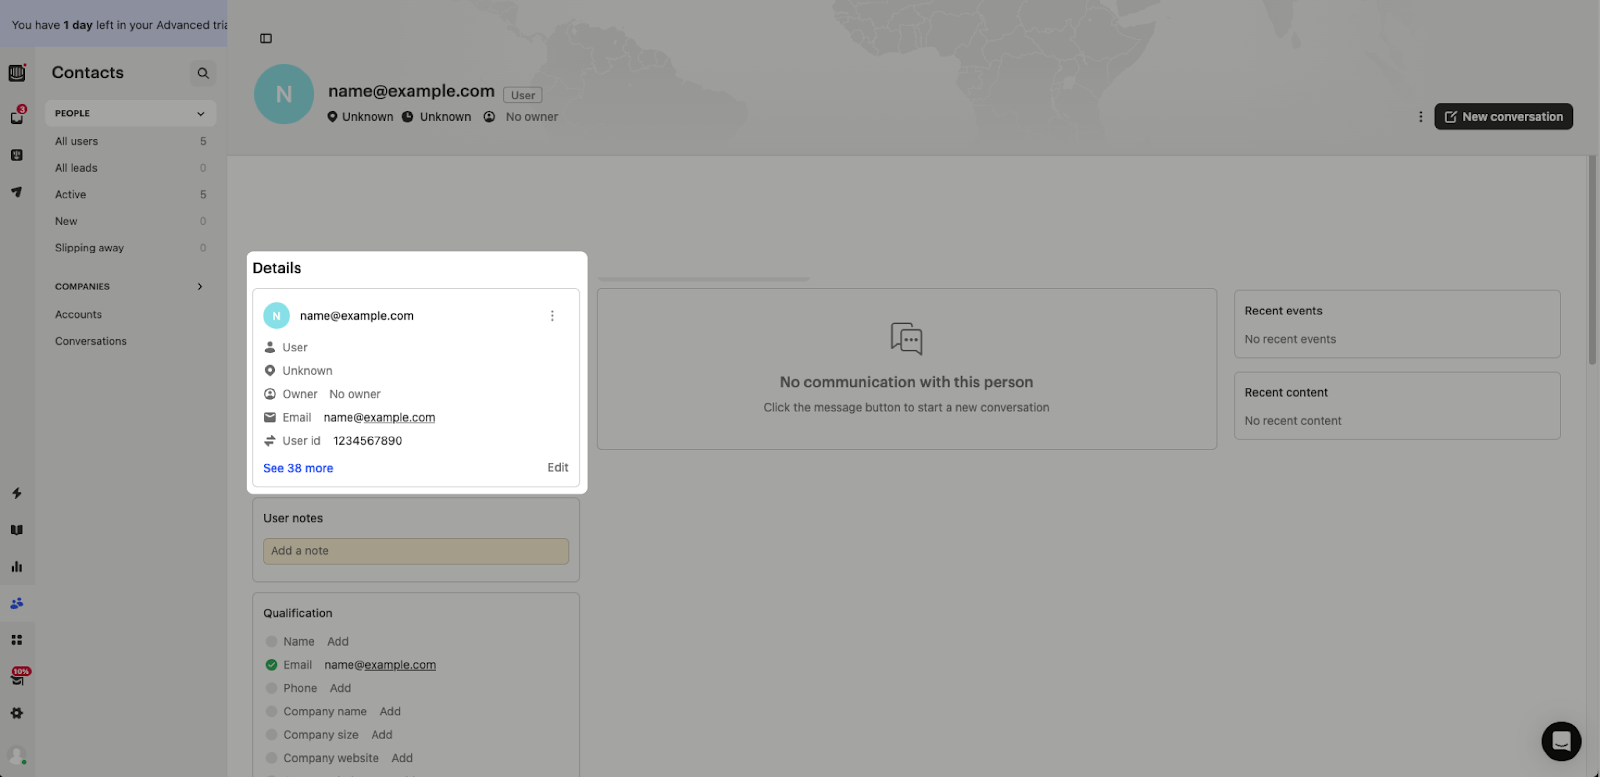
In Intercom, Go to the Contacts page and find the example user. In this case, the email is name@example.com. Click on the user’s email to open their detail page.

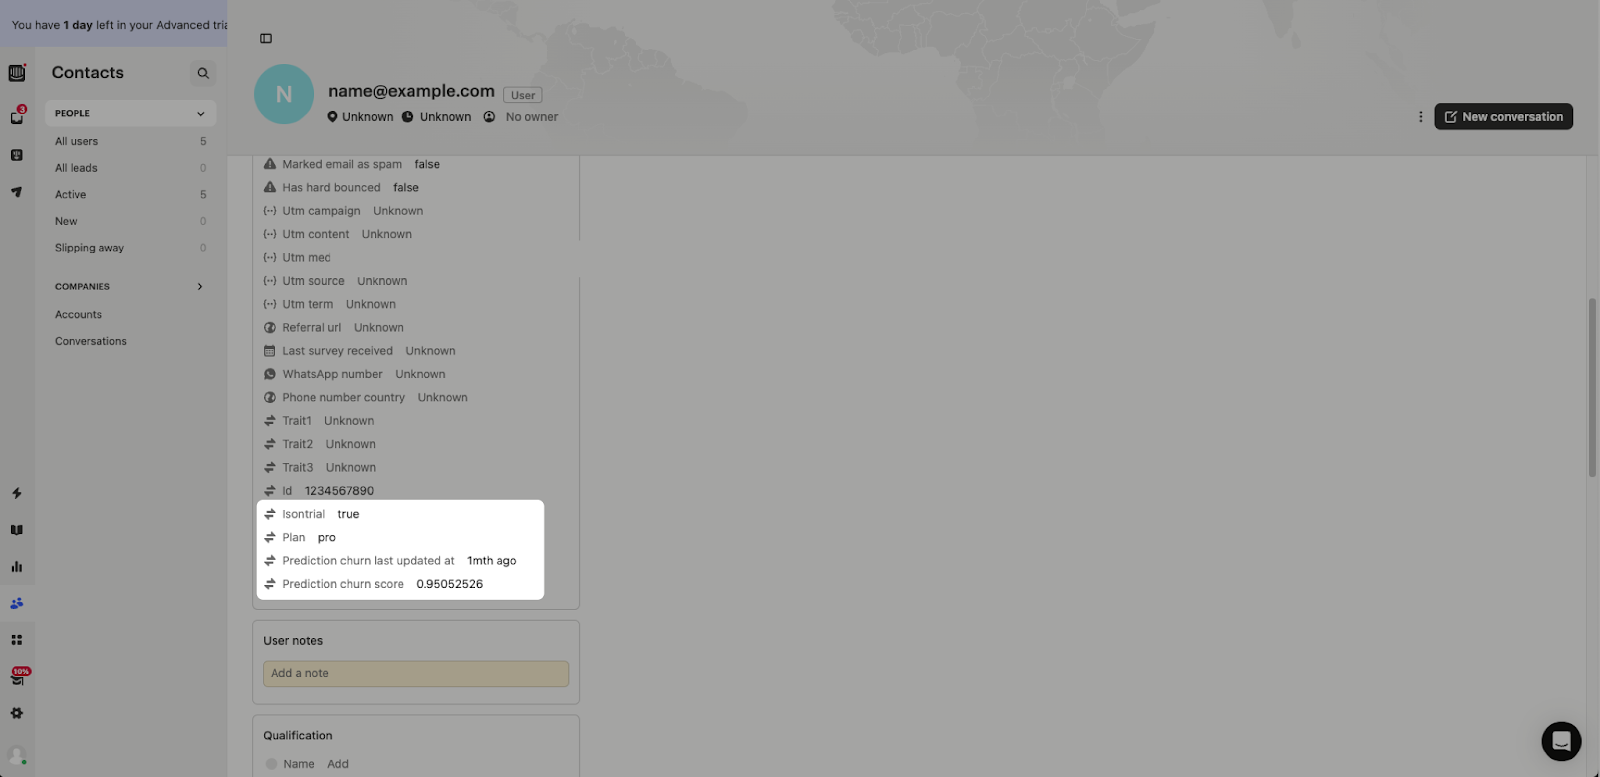
On the user detail page, find the Details panel and click See ## more to expand the panel to see all the attributes associated with this user.
At the bottom, you should see the traits we sent from Upollo in the test event. In this example, we sent the following traits:
- Isontrial: Whether or not this user is currently on a trial
- Plan: The name of the Plan this user is on
- Prediction churn last updated: When the churn prediction score was last updated.
- Prediction churn score: A decimal value from 0-1 that indicates how likely a user is going to churn in the next month. 0 means unlikely (0% chance) that they will churn. 1 means likely (100% chance) that they will churn.
If you see the traits above in your Intercom user details, keep reading and we’ll show you how to take proactive action for people with high churn scores.
Finally, we are at the fun part: Actually preventing churn. We’ve written before about the various reasons why people churn, and how these reasons can actually require a different approach. For this Play, let’s focus on reason #1 from our article, and a very common reason for churning: Not Realizing Enough Value.
These users haven’t used all of the key features in your app, and they haven’t logged in for weeks, resulting in a high churn score. To prevent this churn, let’s set up a campaign to automatically reach out to people who are slipping away.
In Intercom, go to the Proactive Support page. If you already have a company email template, feel free to use that. Click the New message button.
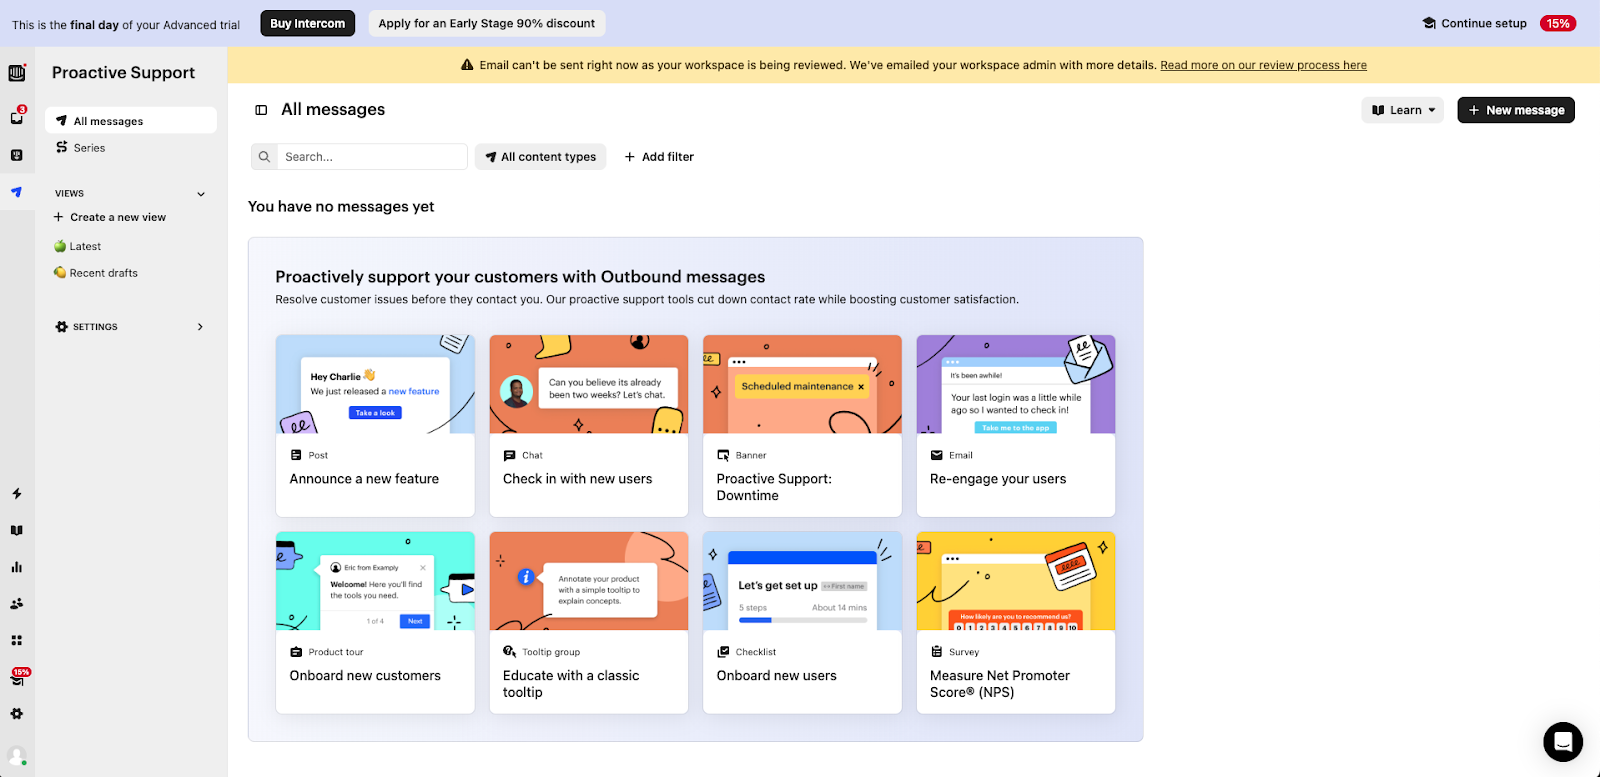
Click the Email section in the left column. For this example, we can use the Re-engage your users template.

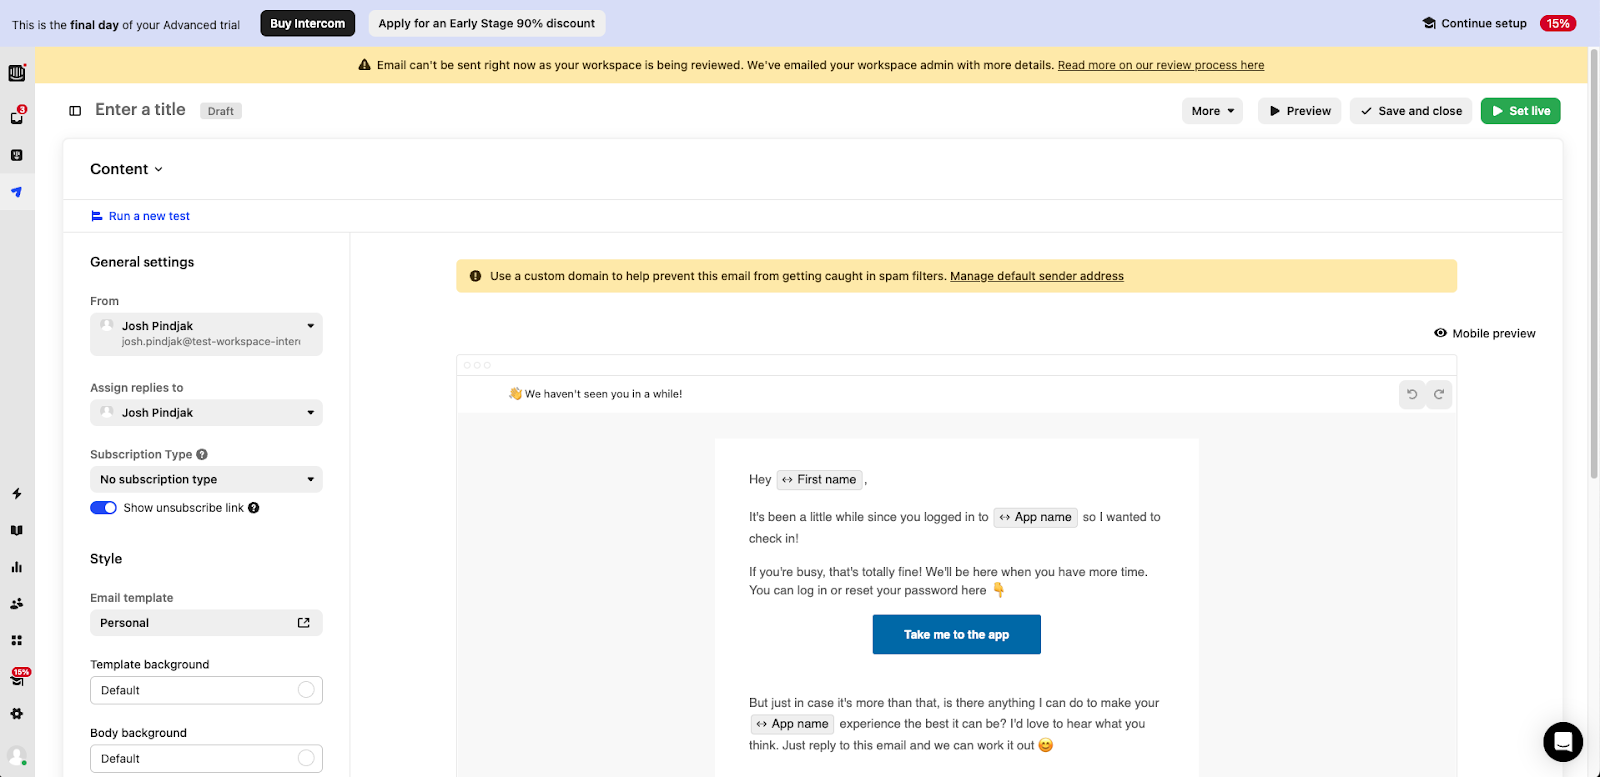
Select your styling (either Plain, Personal or Company) and click Use this template. For a company-branded email to many people, we recommend using Personal or Company. For a 1-to-1 personalized email, we recommend using the Plain template.

Configure the template however you want. Keep in mind, this user is very likely to churn.
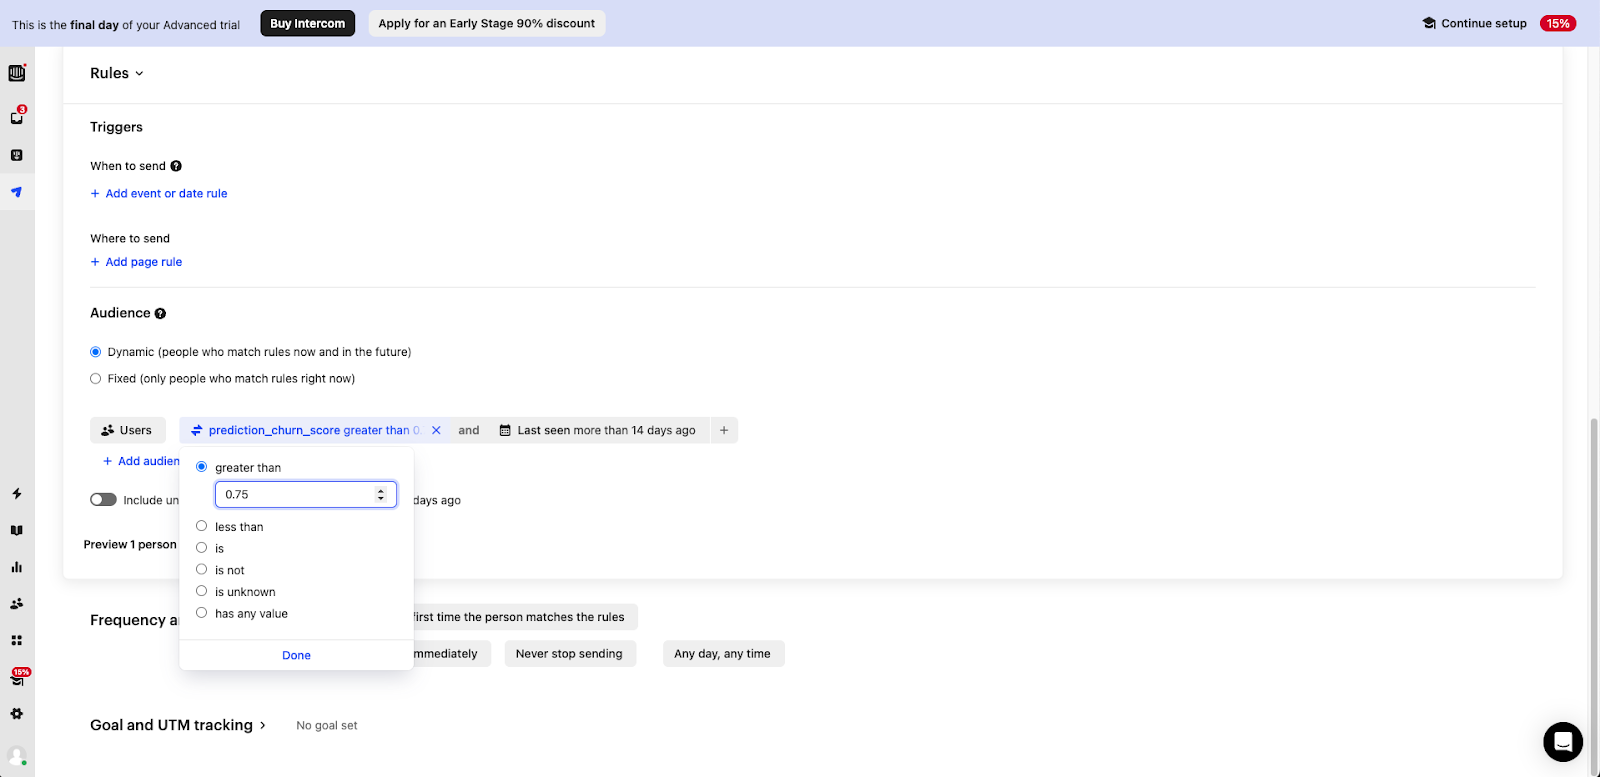
Scroll down to the Rules section, and set the following filters in the Audience sub-section:
- Users
- Prediction_churn_score: Greater than 0.75 (75%, or whichever threshold you want)
- Last seen: More than 14 days ago (or whichever threshold makes sense for your company)
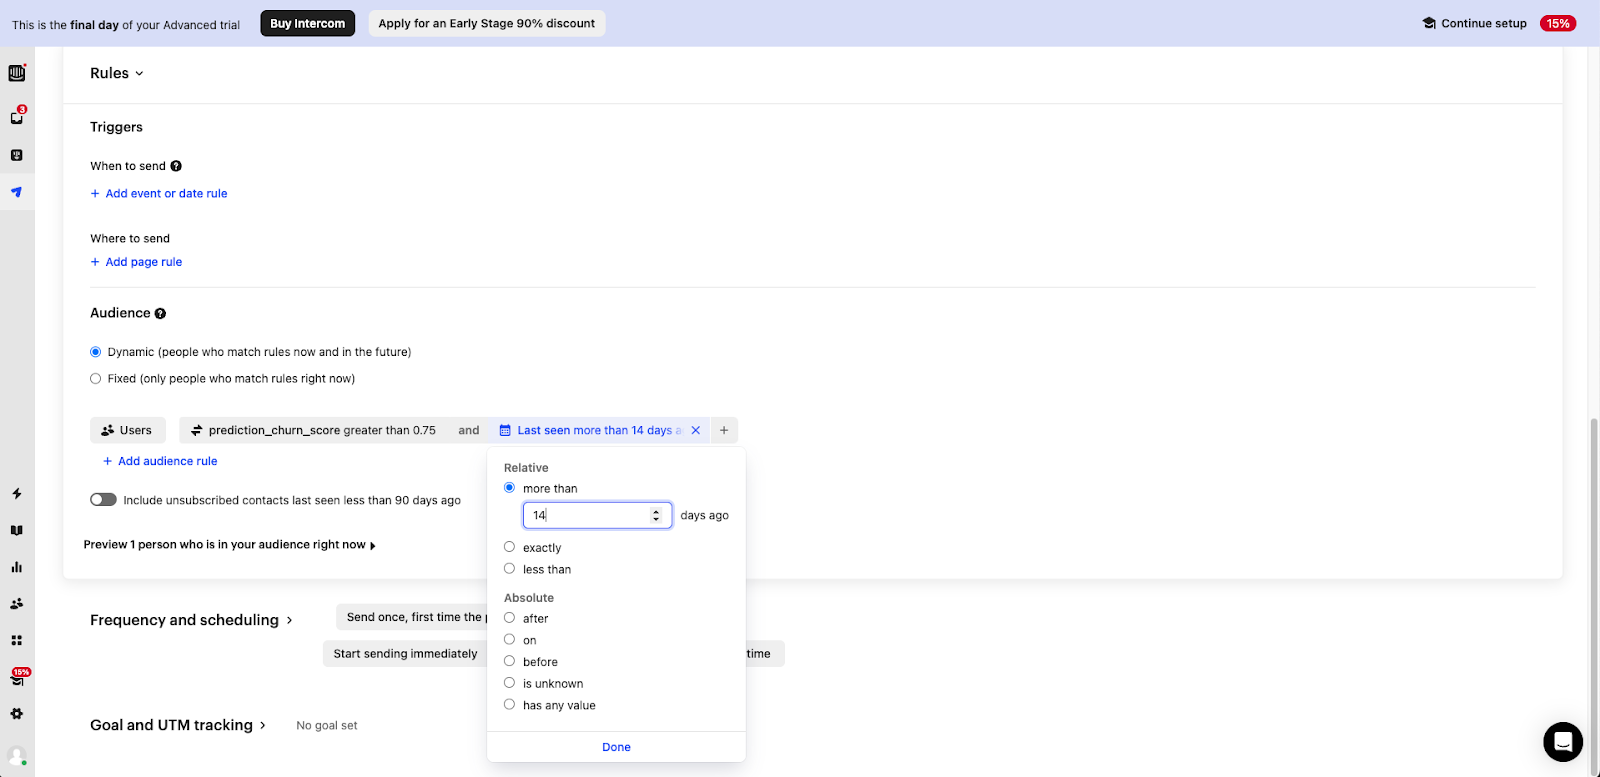
After setting your Audience Rules, the example user from earlier should appear in the “Preview # people who is in your audience right now” section. If the example user doesn’t appear here, check their Last seen date and try again.

After you’re done, scroll back up and send a Preview to yourself to double check everything, and then Save the email. When you’re ready to go live, click the green Set Live button at the top right. This email will be sent to all users with a high churn score (75%+), and haven’t been seen in 14 days.
Bonus: Flag Inquiries from High-Churn Score Customers
Since we’re already using Intercom for this play, let’s set up another automation to make our teams lives easier. In this part, we’re going to automatically flag Intercom messages that are sent from users with high churn scores, as well as assign these messages to our Customer Success team. This way, everyone is kept in the loop and our teammates can take proactive action in case something goes wrong.
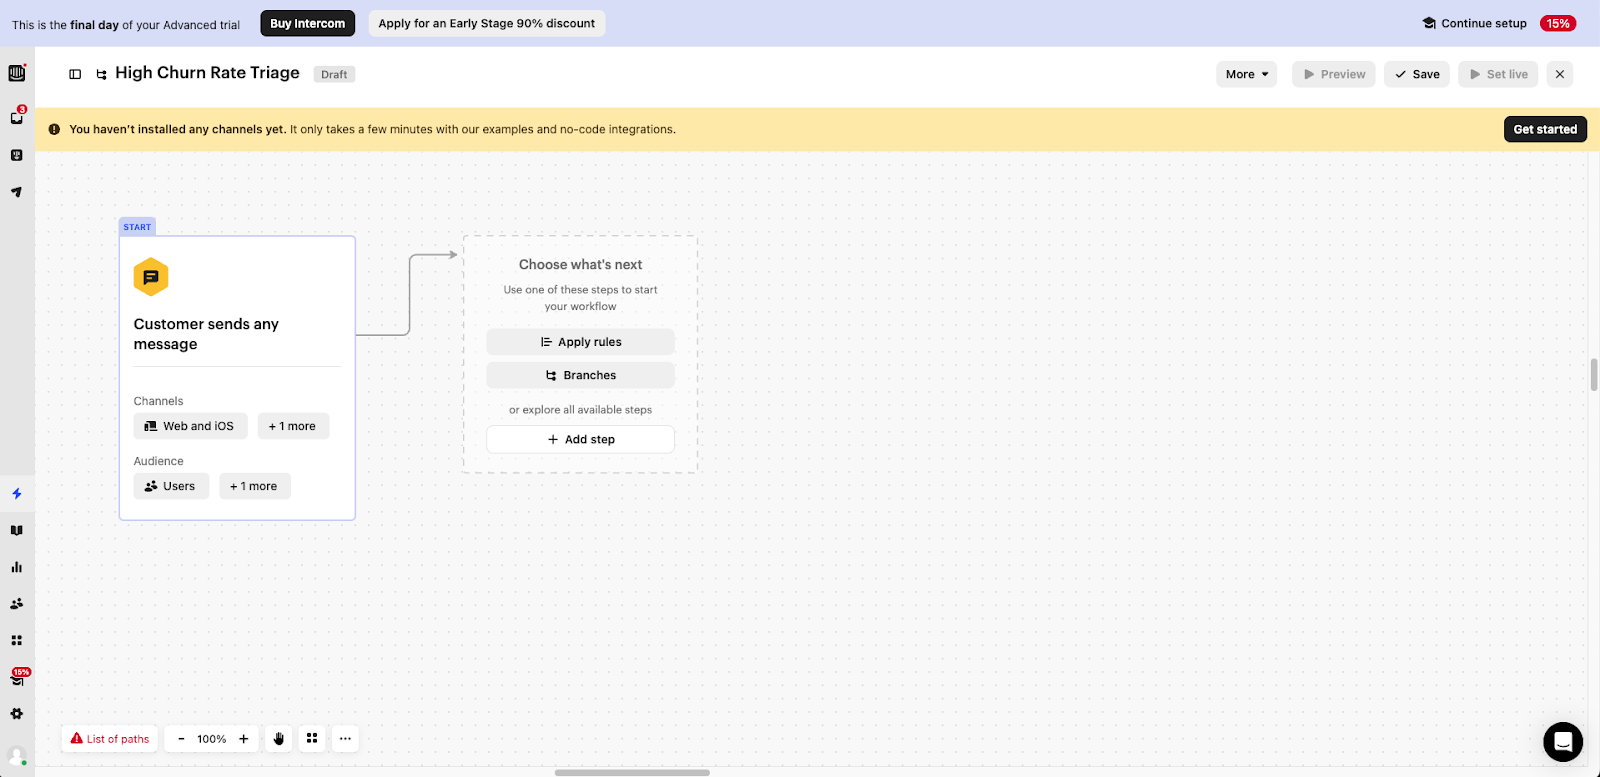
In Intercom, go to the Automation tab, and click on Workflows. Click New workflow.
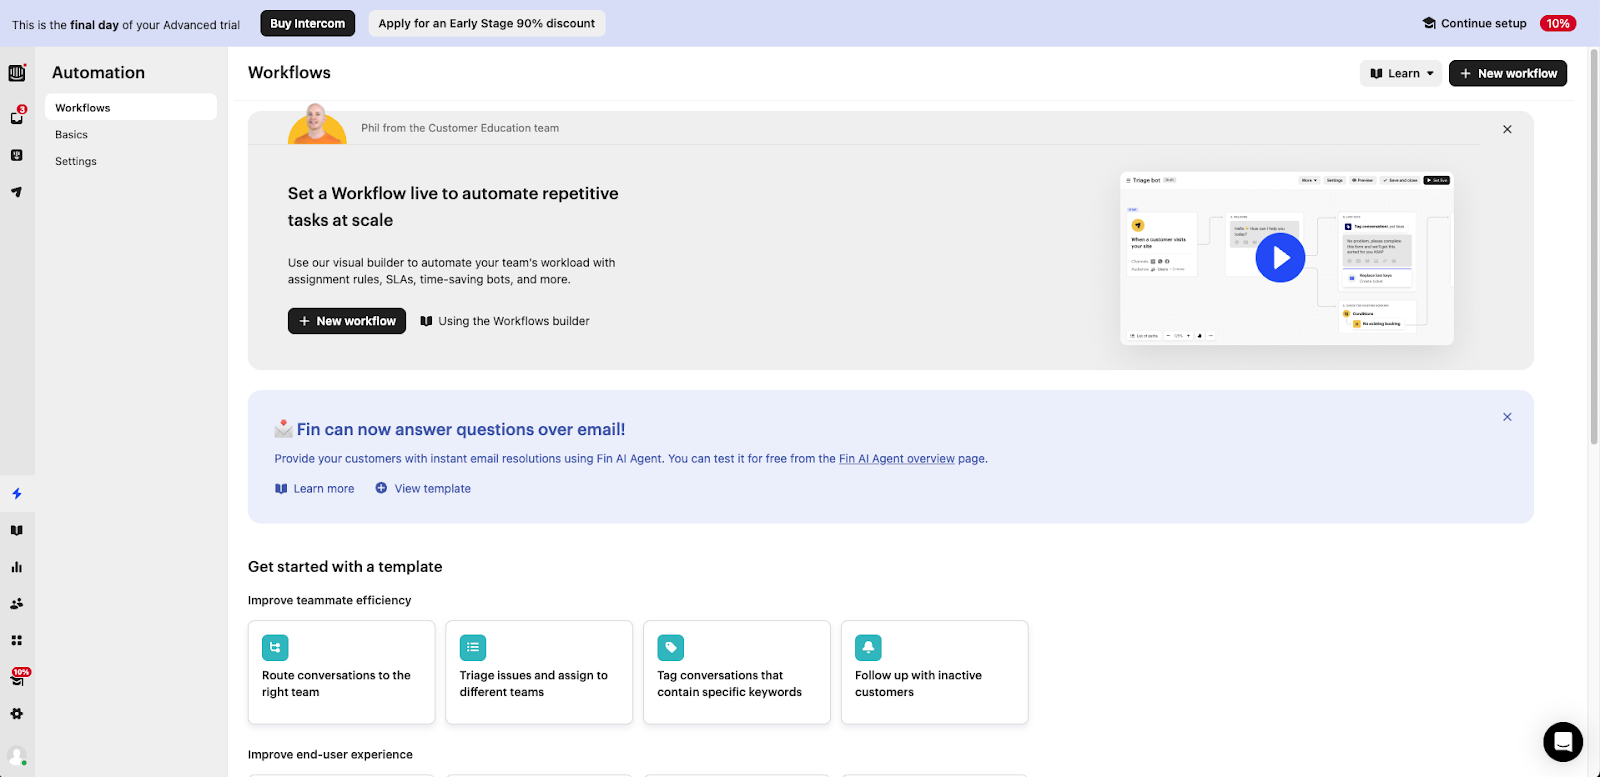
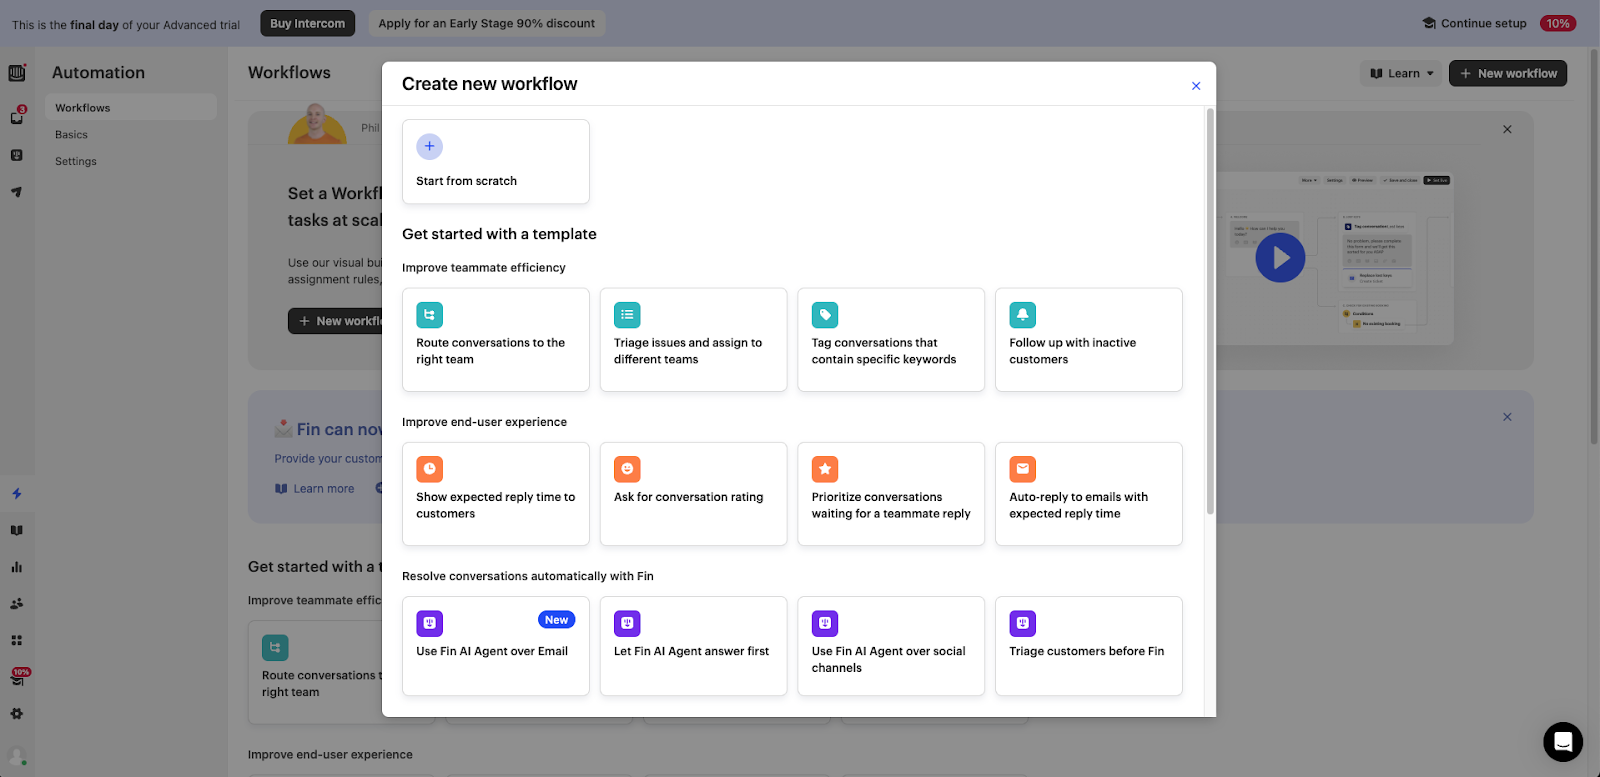
Click Start from scratch.
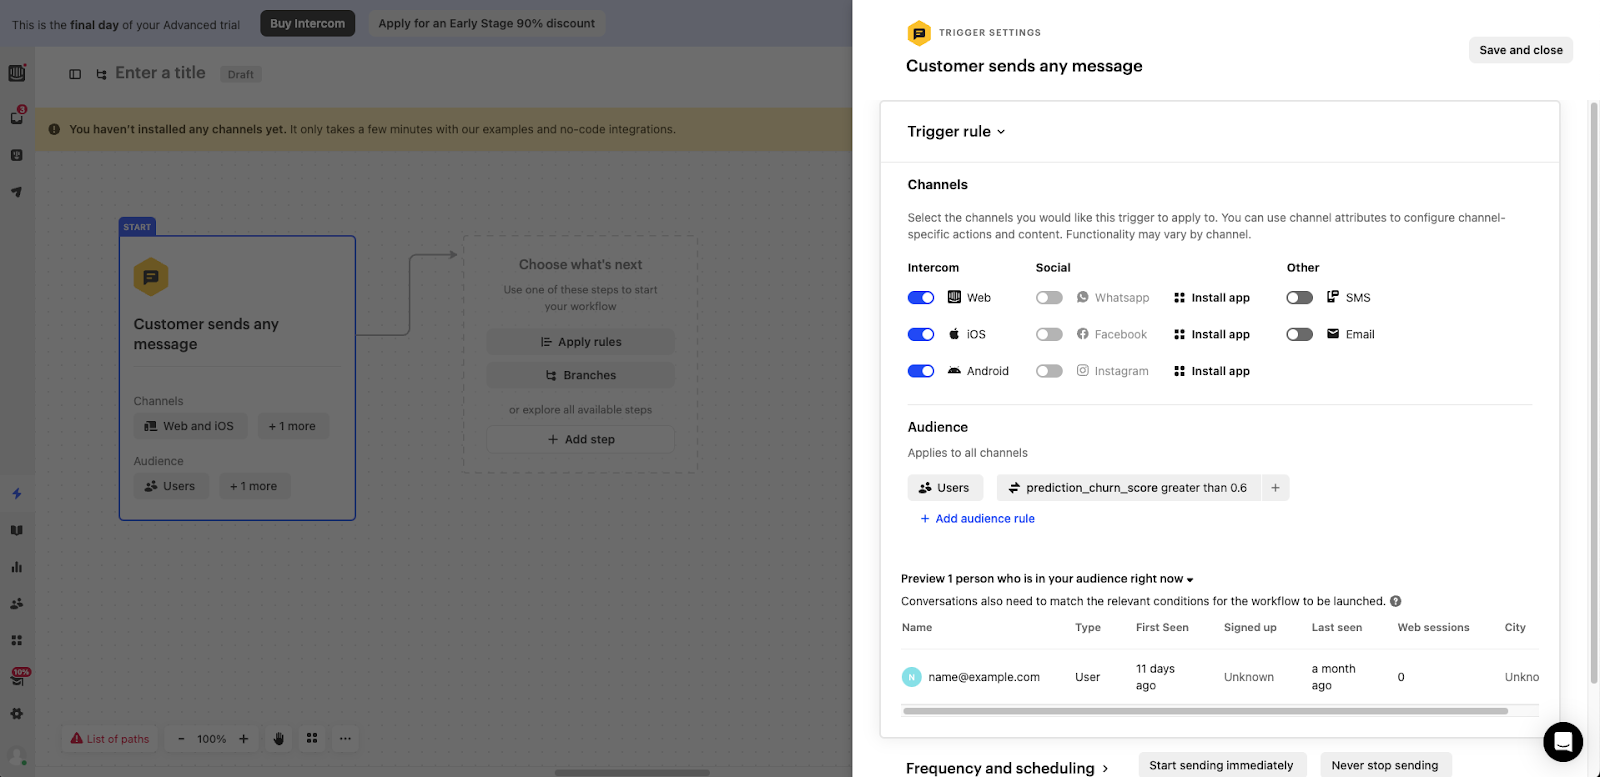
We’re going to use similar Audience filters as before.

In the Audience section, add a new Filter for prediction_churn_score and set this value to 0.6 or whichever threshold you want.
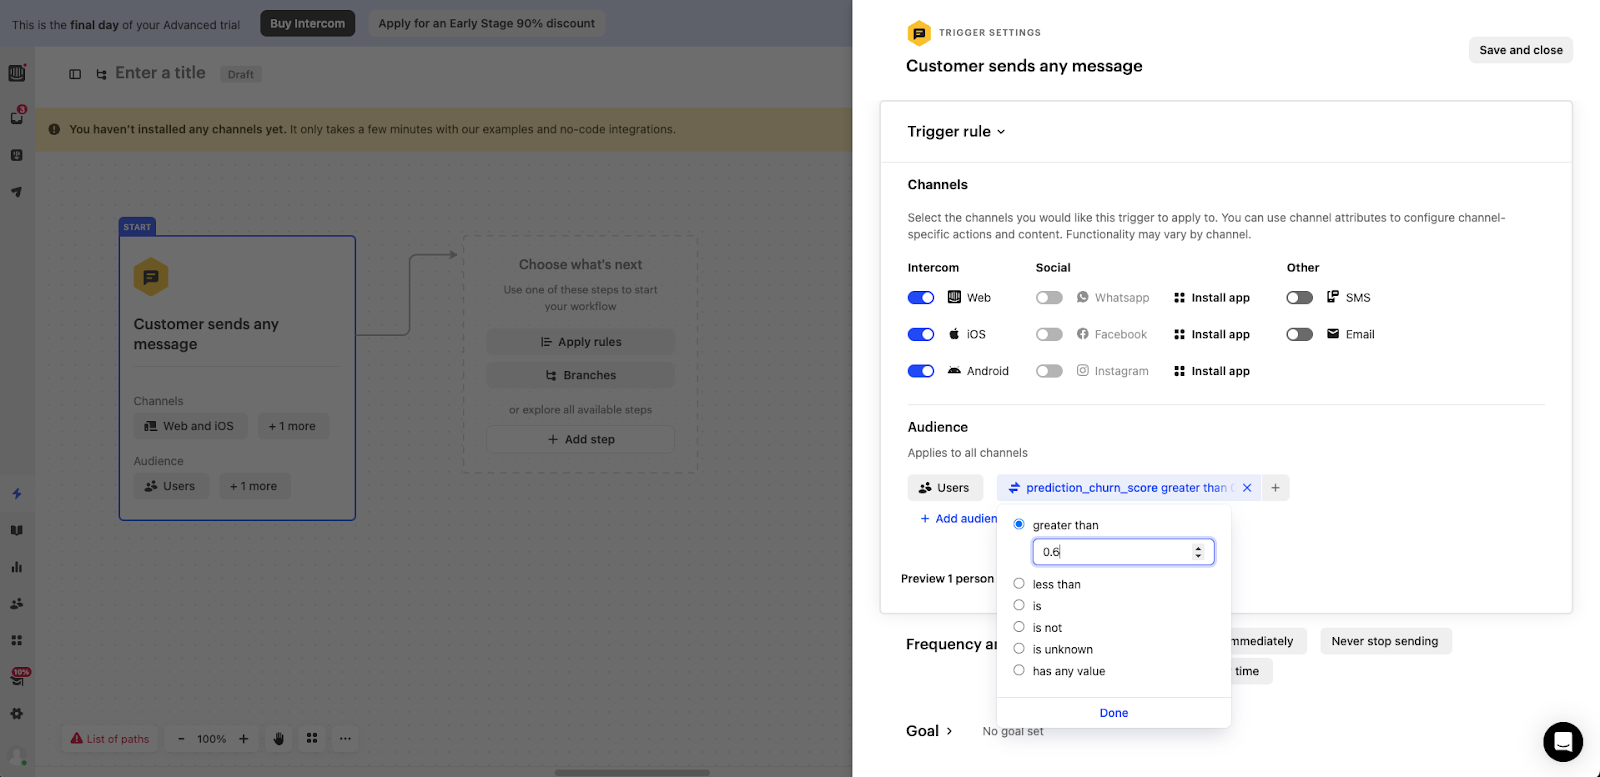
Again, you can check that this is working by verifying that our example user is present in the Preview # person who is in your audience right now section. Click Save and close.
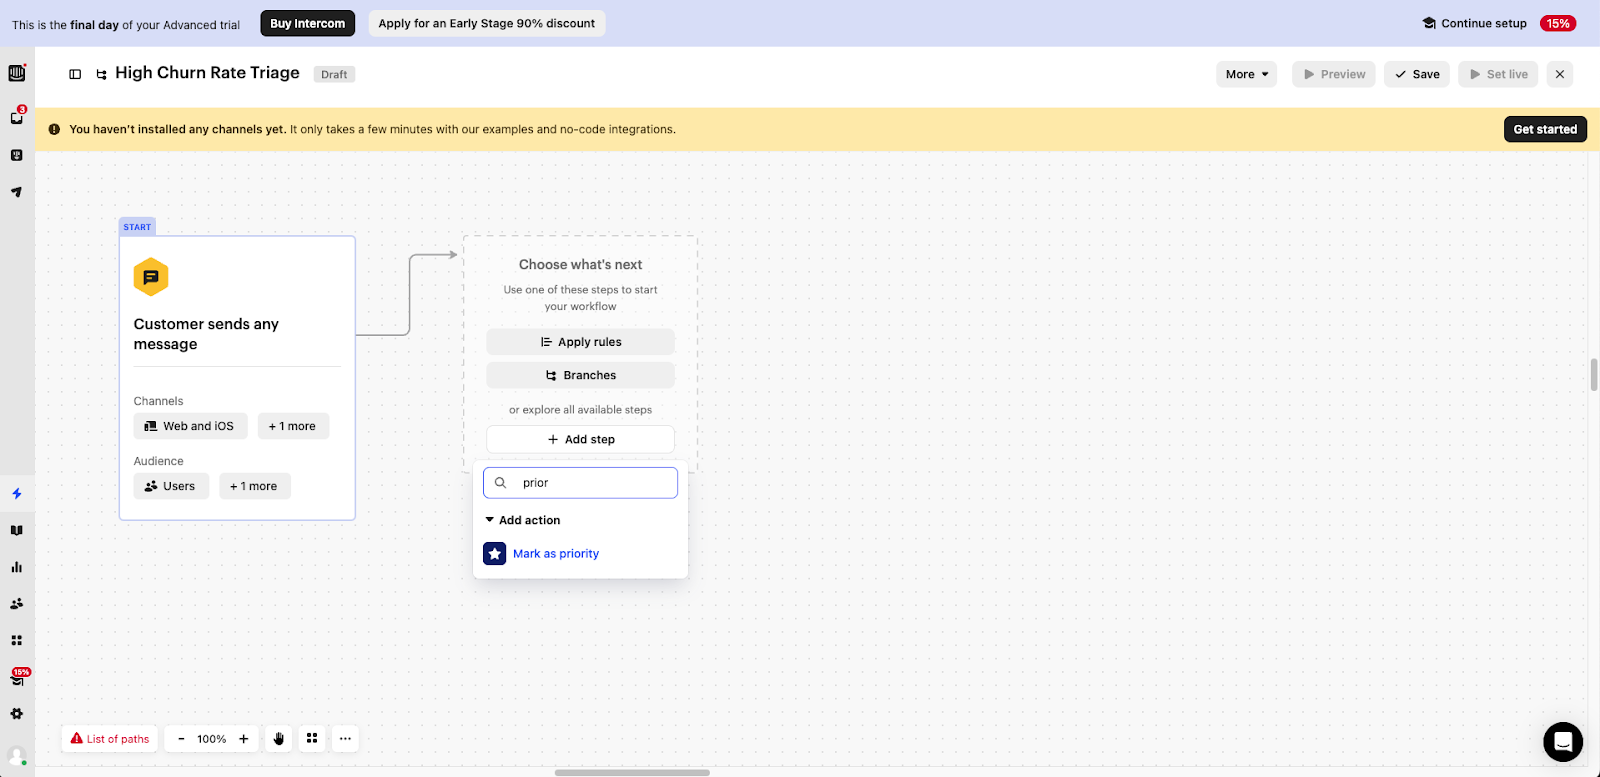
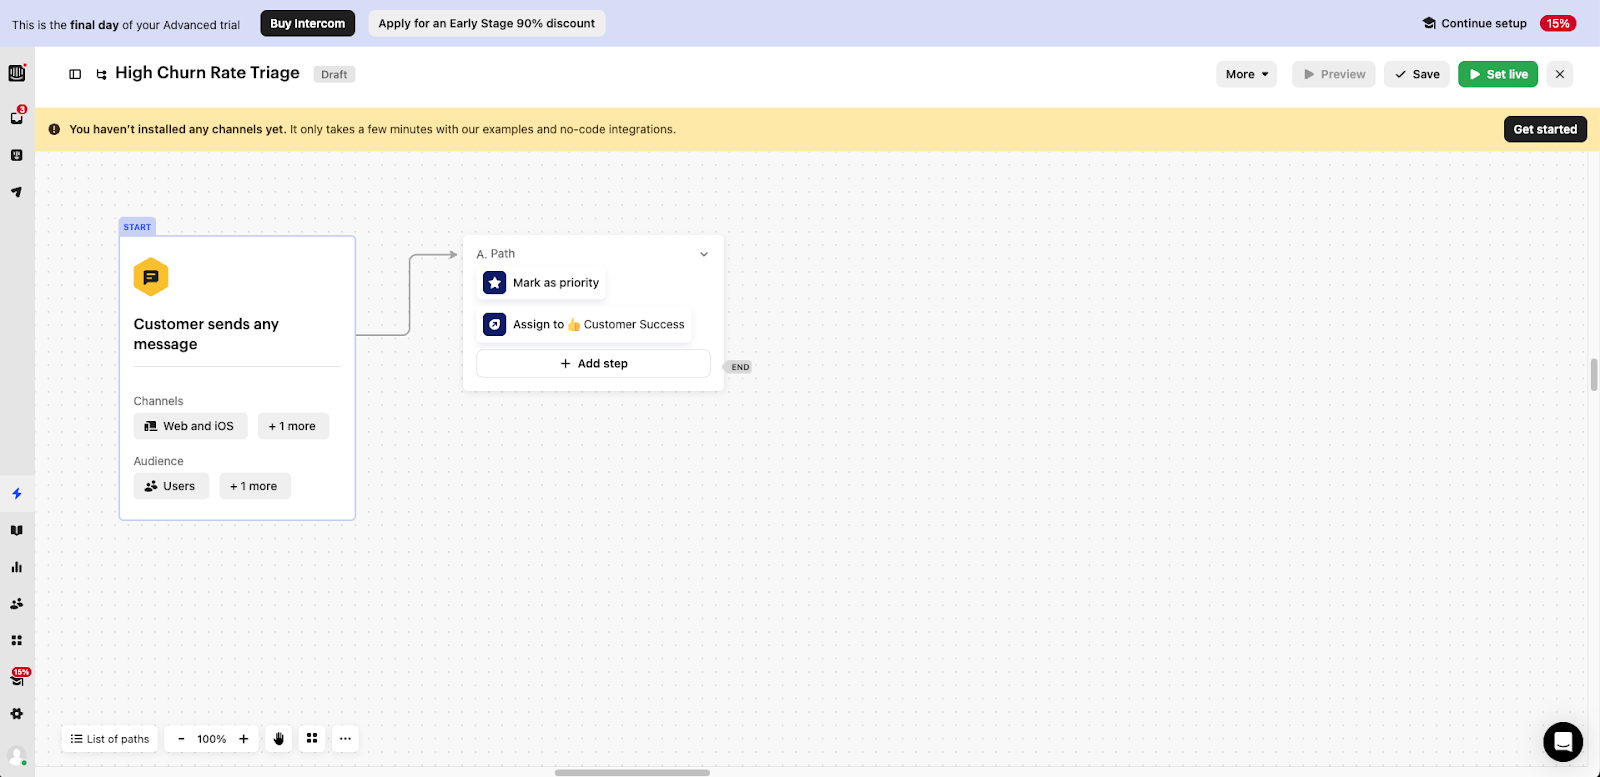
Click Add step. We’re going to take 2 actions during the same step.
First, add the Mark as priority step. This lets your team know it’s urgent.
Next, assign it to a team. In this example, we’re going to assign it to our Customer Success team.

Now you’re done! Click the green Set live button.
After setting this workflow live, any user who reaches out to Support via intercom, and has a high churn score, will automatically be marked as a priority and automatically assigned to your customer success team to take proactive action.
By combining Upollo’s powerful churn prediction scoring with your existing tech stack, you can now send tailored campaigns and personalized 1-to-1 outreach to your customers who are going to churn soon. Need help crushing churn at your company? Upollo is here to help.


Get this Play for Free
Automate your churn prevention, conversion, and expansion strategies