Churn Scores & CSM Workflows for Salesforce
Integrate our powerful churn prediction scores with Salesforce to automatically identify at-risk customers and take proactive retention actions.
Preventing churn starts with knowing which customers are at risk. This guide will walk you through connecting Upollo's powerful churn prediction capabilities directly to your Salesforce instance, allowing your team to take proactive action right where they already work.
1. Connect Salesforce to Upollo
Upollo uses a managed package to add custom fields and components to your Salesforce organization, allowing real-time synchronization of churn predictions and other insights.
Open the Upollo Salesforce package installation link.
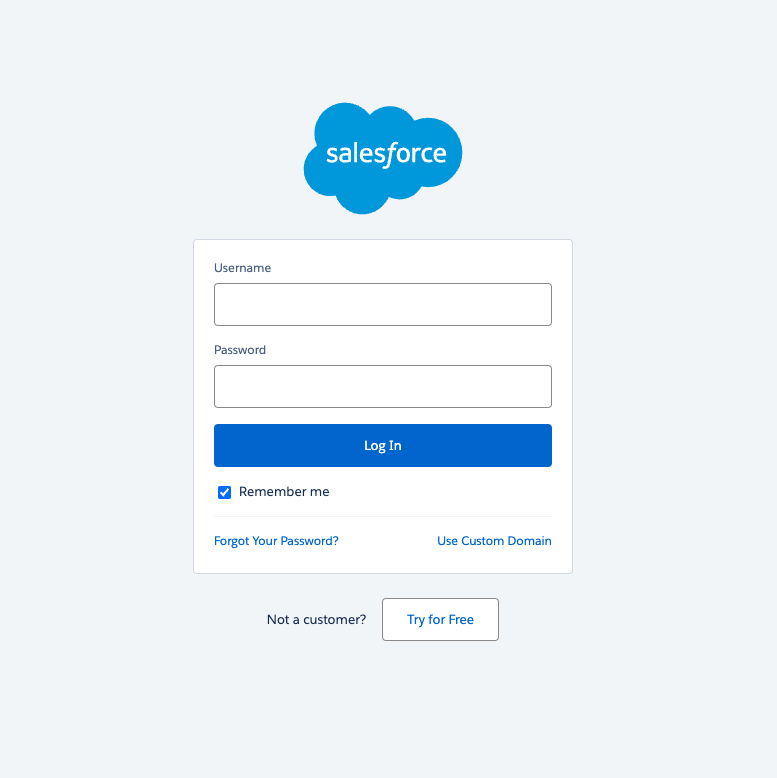
Log in to your Salesforce account when prompted.
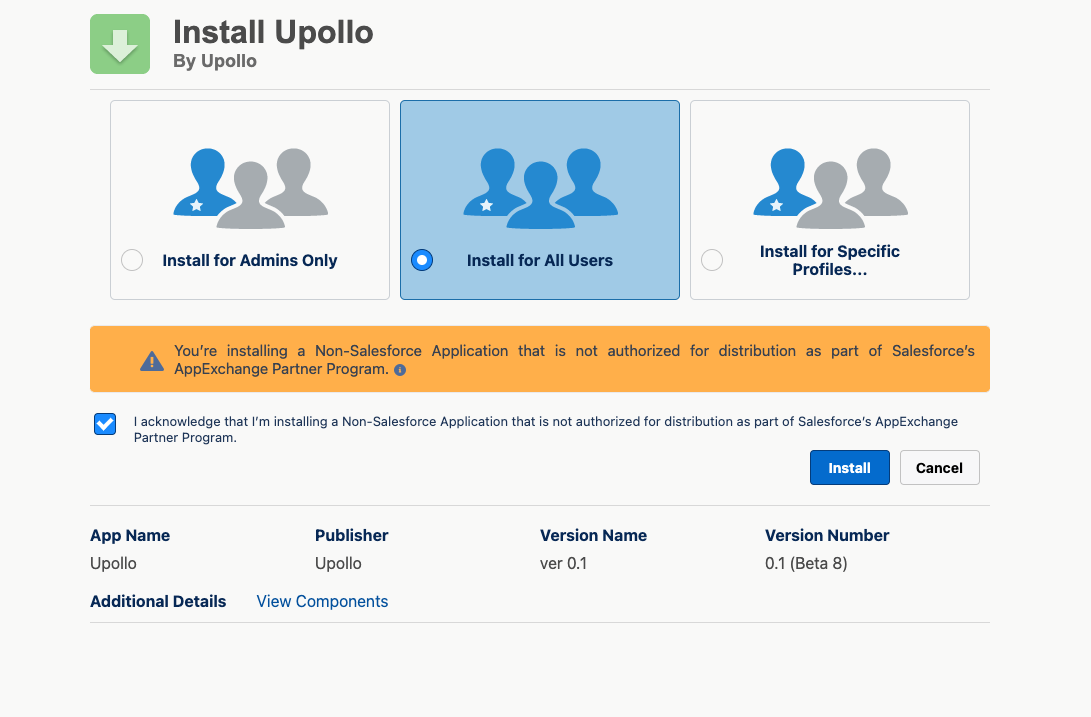
Install the package for all users (recommended) or adjust as needed for your organization. This will add the necessary custom fields that Upollo can populate.
Now connect Upollo to your Salesforce instance:
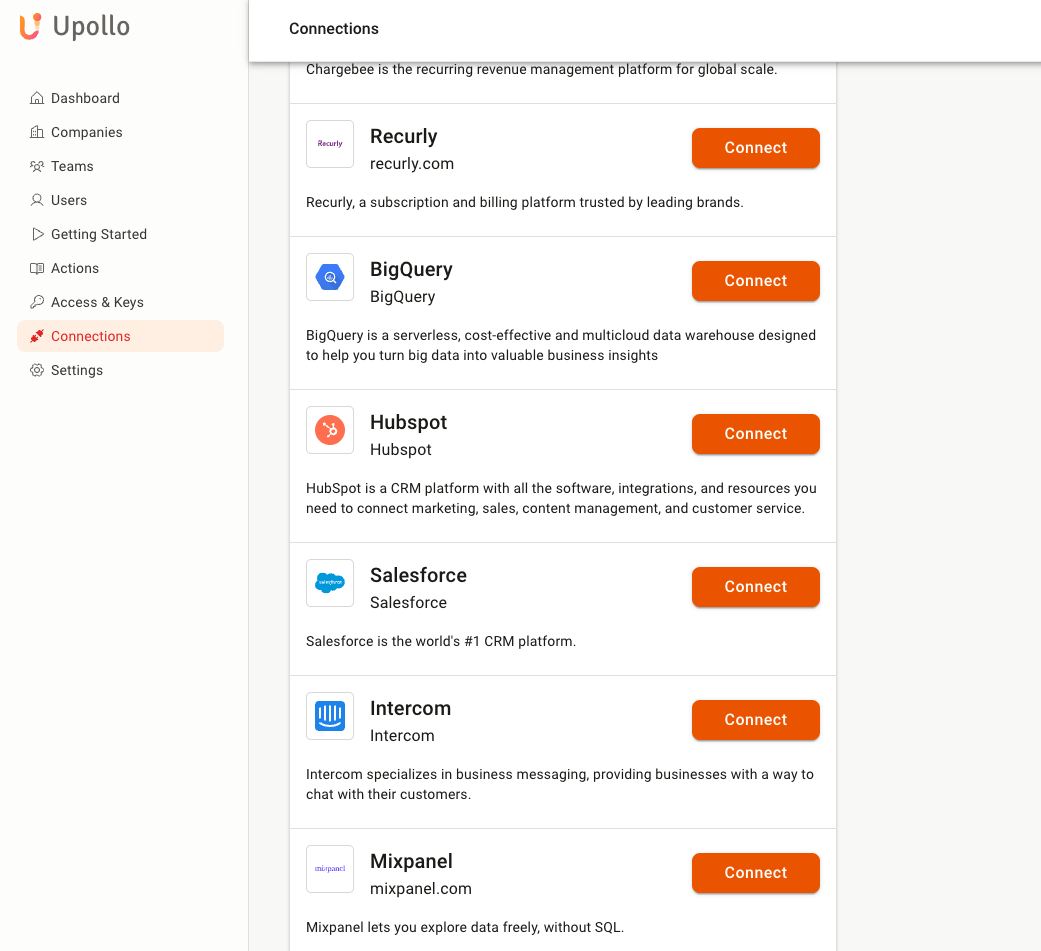
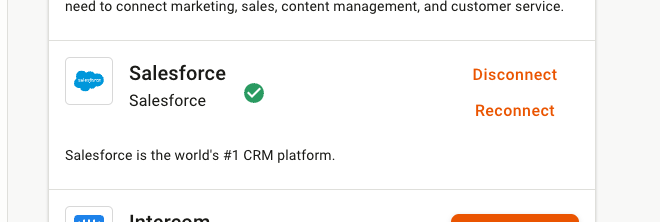
- Log in to Upollo and navigate to the Connections page
- Find Salesforce and click Connect
- Follow the prompts to authenticate and authorize the connection
2. Add Churn Scores as Columns in Salesforce
Once connected, you'll need to make the Upollo fields visible in your Salesforce views. There are two main ways to do this:
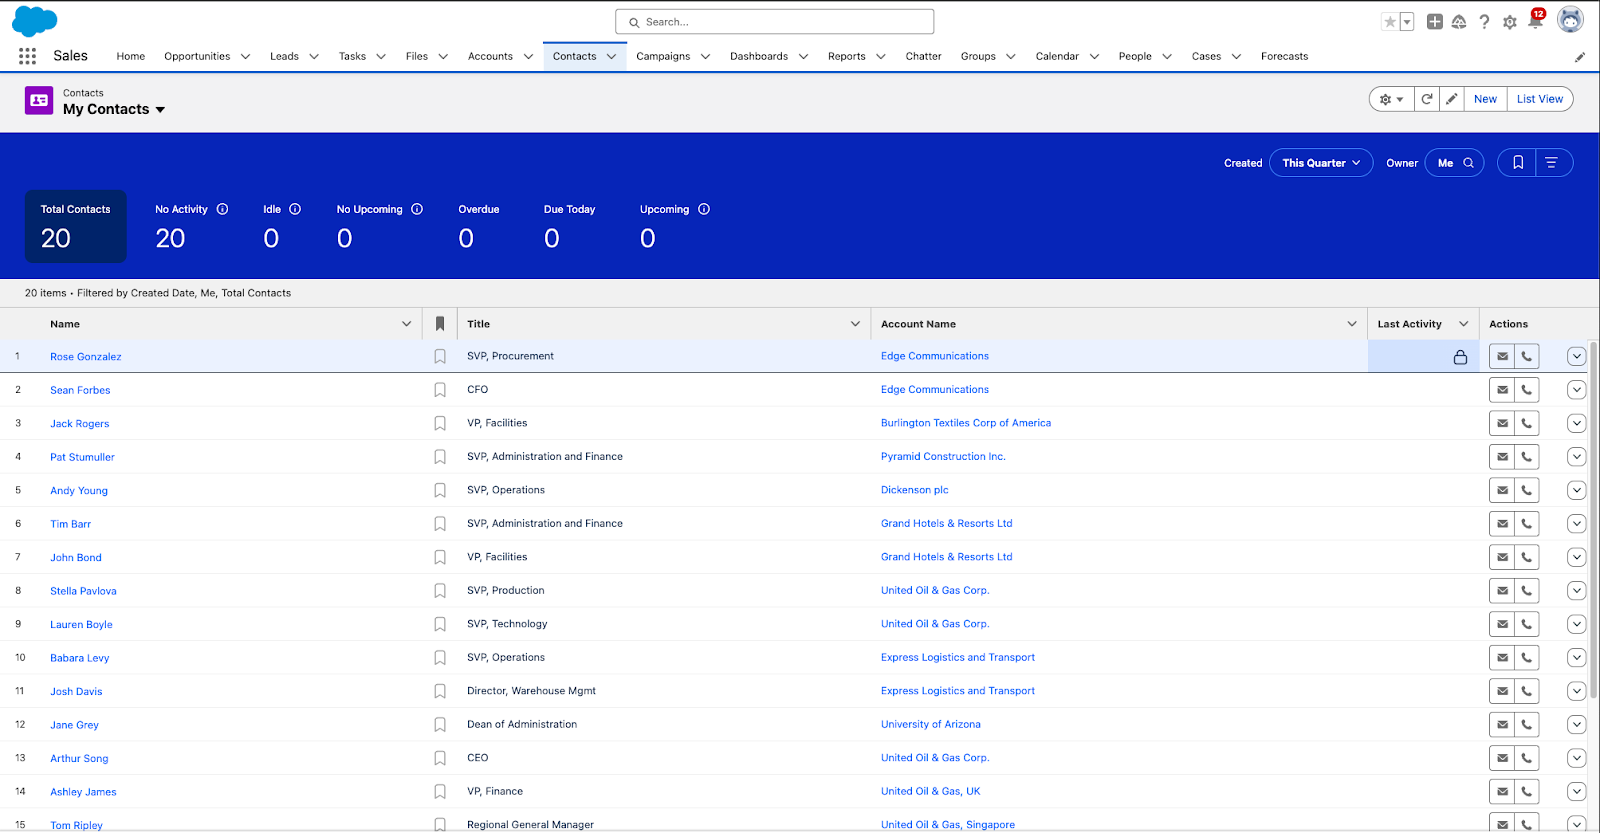
To add columns to contact lists:
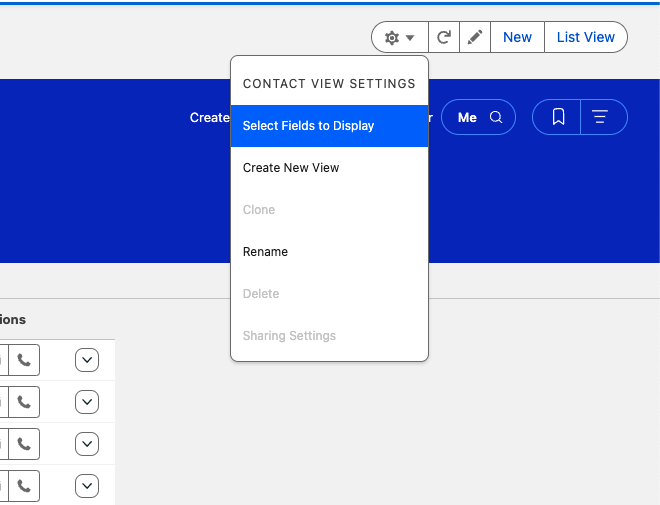
- While viewing a contacts list, click the settings cog
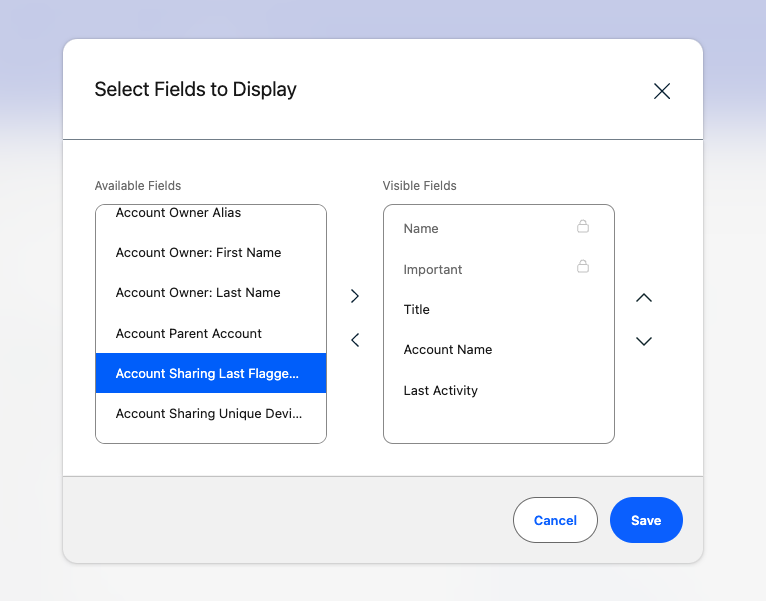
- Select "Fields to Display"
- Add the desired Upollo fields (look for fields with the upollo__ prefix)
- Click save
- Your contact list will now display Upollo's churn predictions
To add fields to contact detail pages:
- Open any contact record
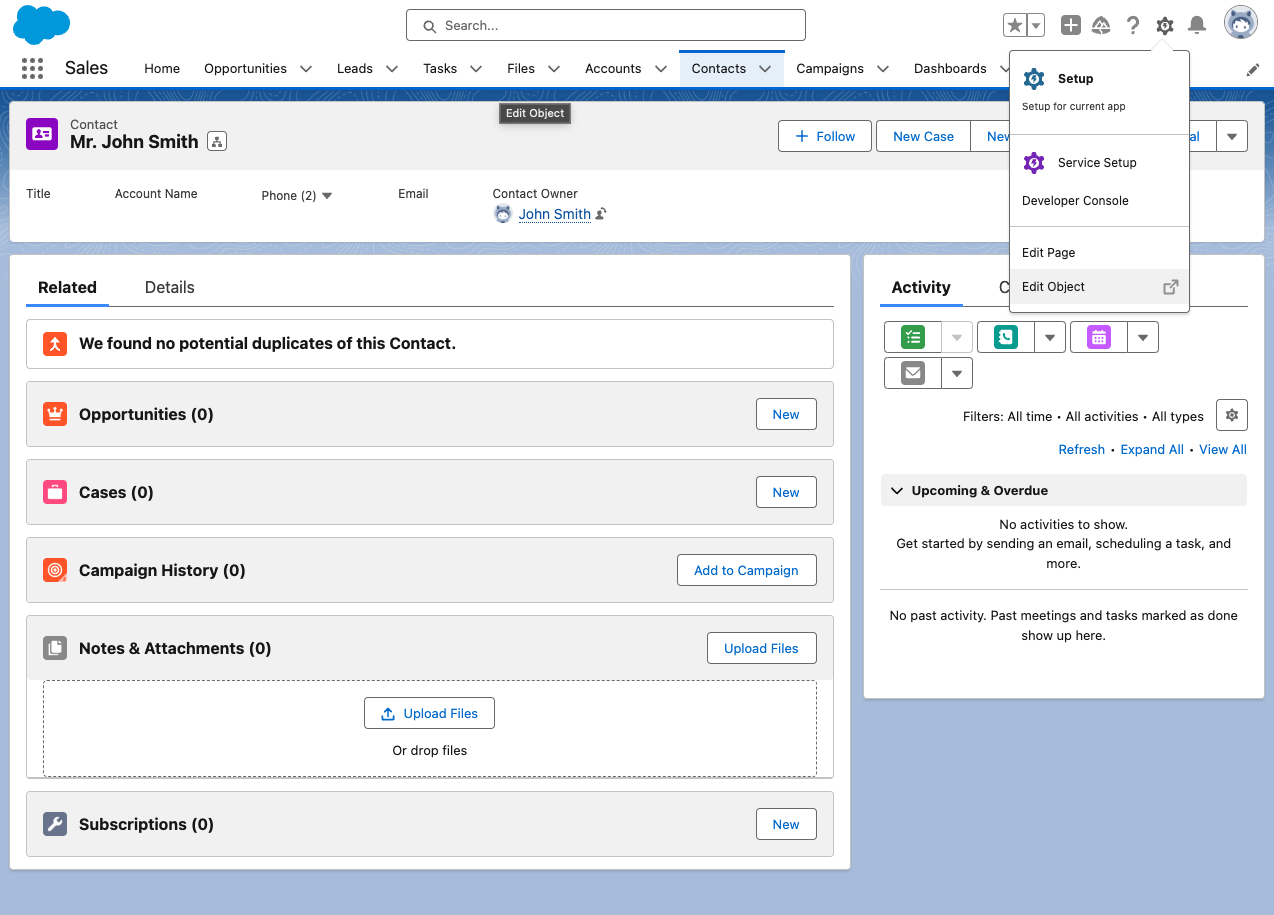
- Click the settings cog and select "Edit Object"
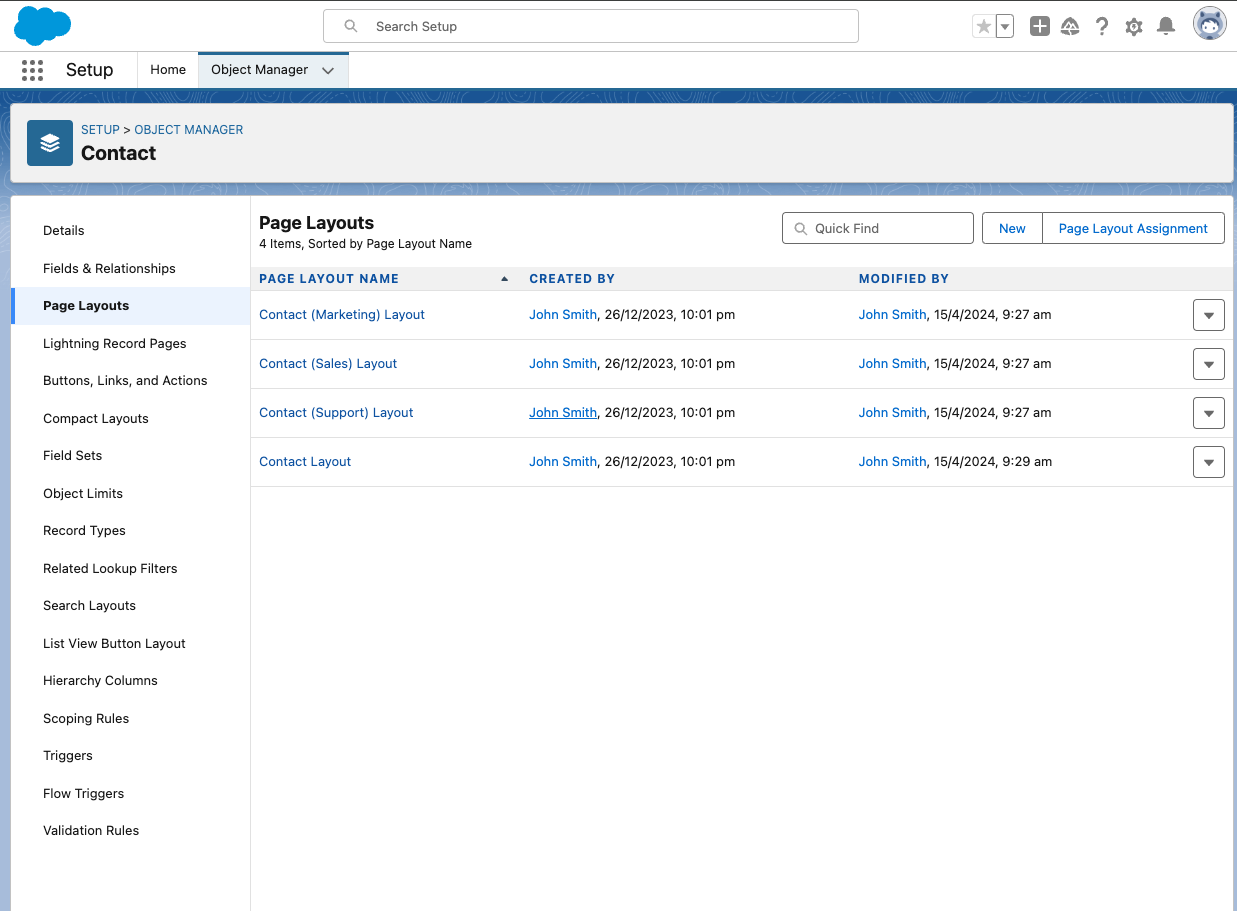
- Navigate to "Page Layouts" and select the layout you want to modify
- Drag and drop Upollo fields into your preferred section of the layout
- Save your changes (note that layout changes may take some minutes to appear due to Salesforce caching)

Key Upollo fields to consider adding:
- upollo__ChurnScore__c (shows likelihood of customer churn)
- upollo__ChurnScoreUpdateTime__c (shows when the prediction was last updated)
- upollo__ConversionScore__c (shows likelihood of conversion for prospects)
- upollo__Url__c (direct link to the customer's profile in Upollo)
3. Create an Automation in Salesforce Flow Builder
Now let's create a flow that automatically alerts your team when a customer has a high churn risk:
Navigate to Flow Builder:
- In Salesforce, click on the gear icon in the upper right
- Select "Setup"
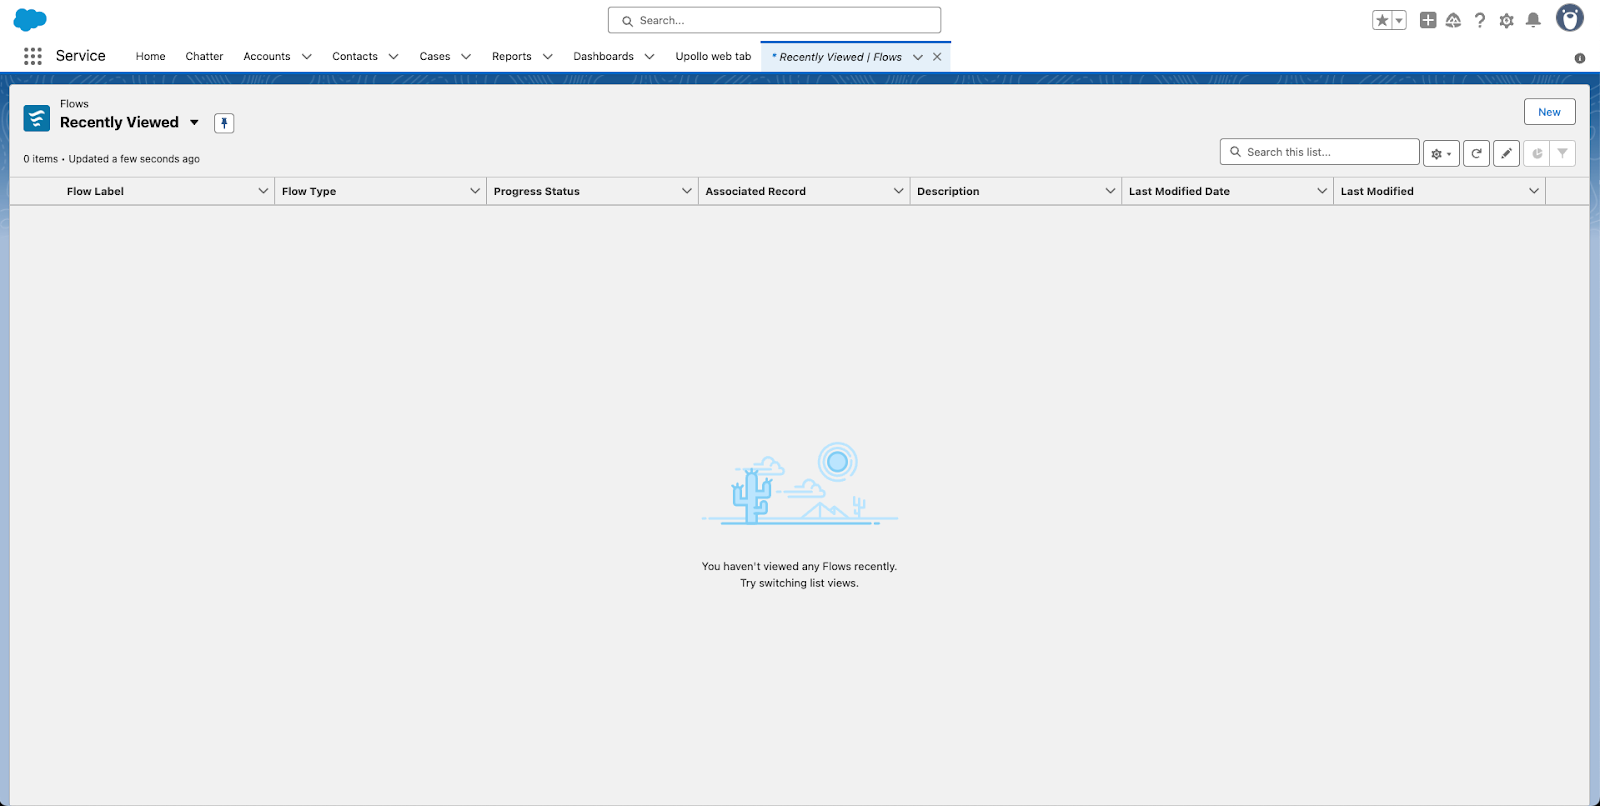
- In the Quick Find box, type "Flows"
- Click on "Flows" under Process Automation
Create a new Flow:
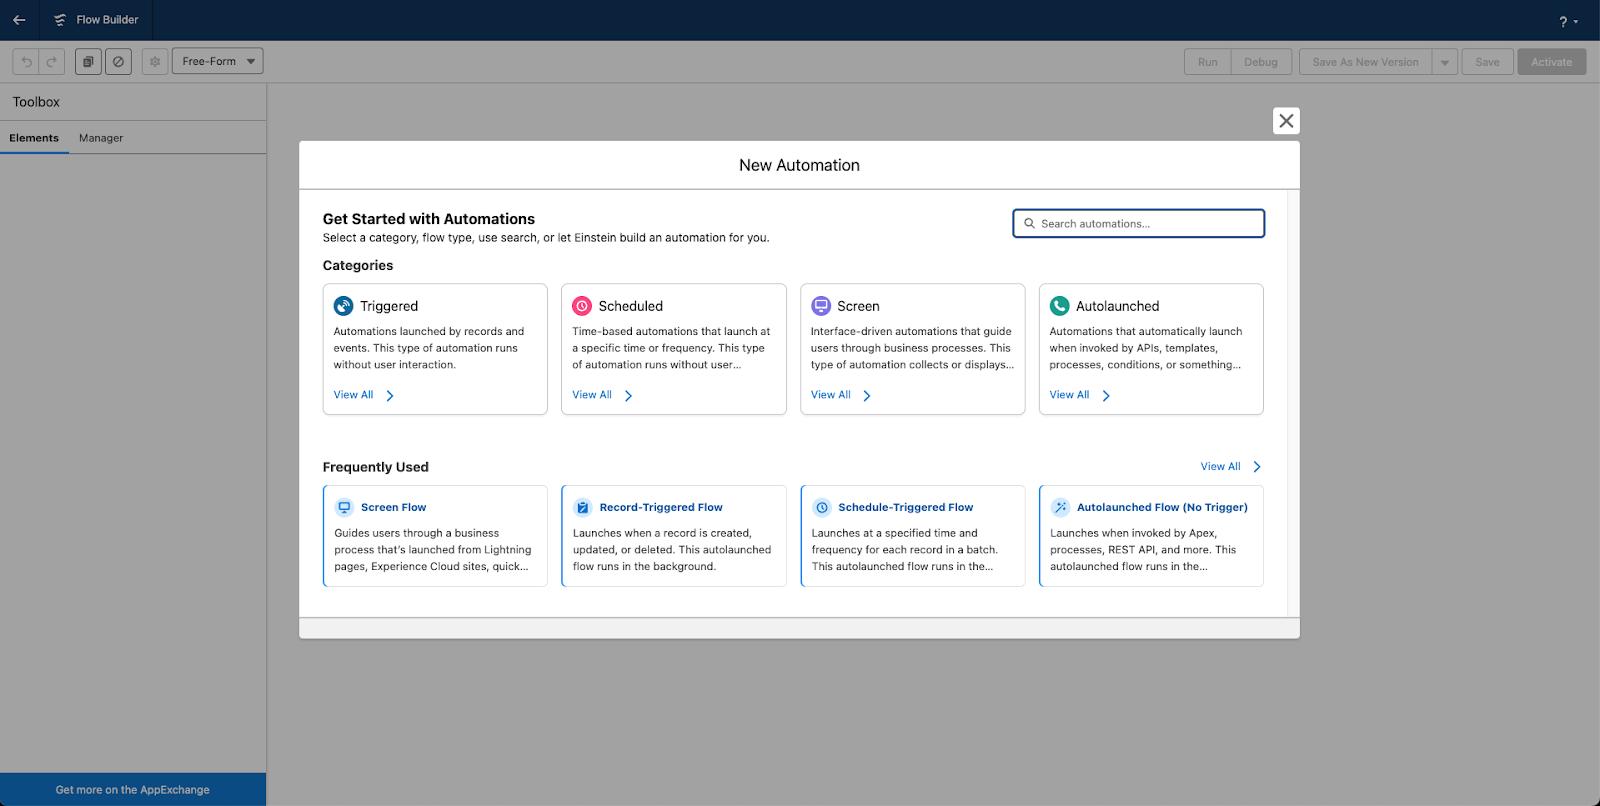
- Click "New Flow"
- Select “Triggered” under Categories
- Select "Record-Triggered Flow" as the type
- Click "Create"

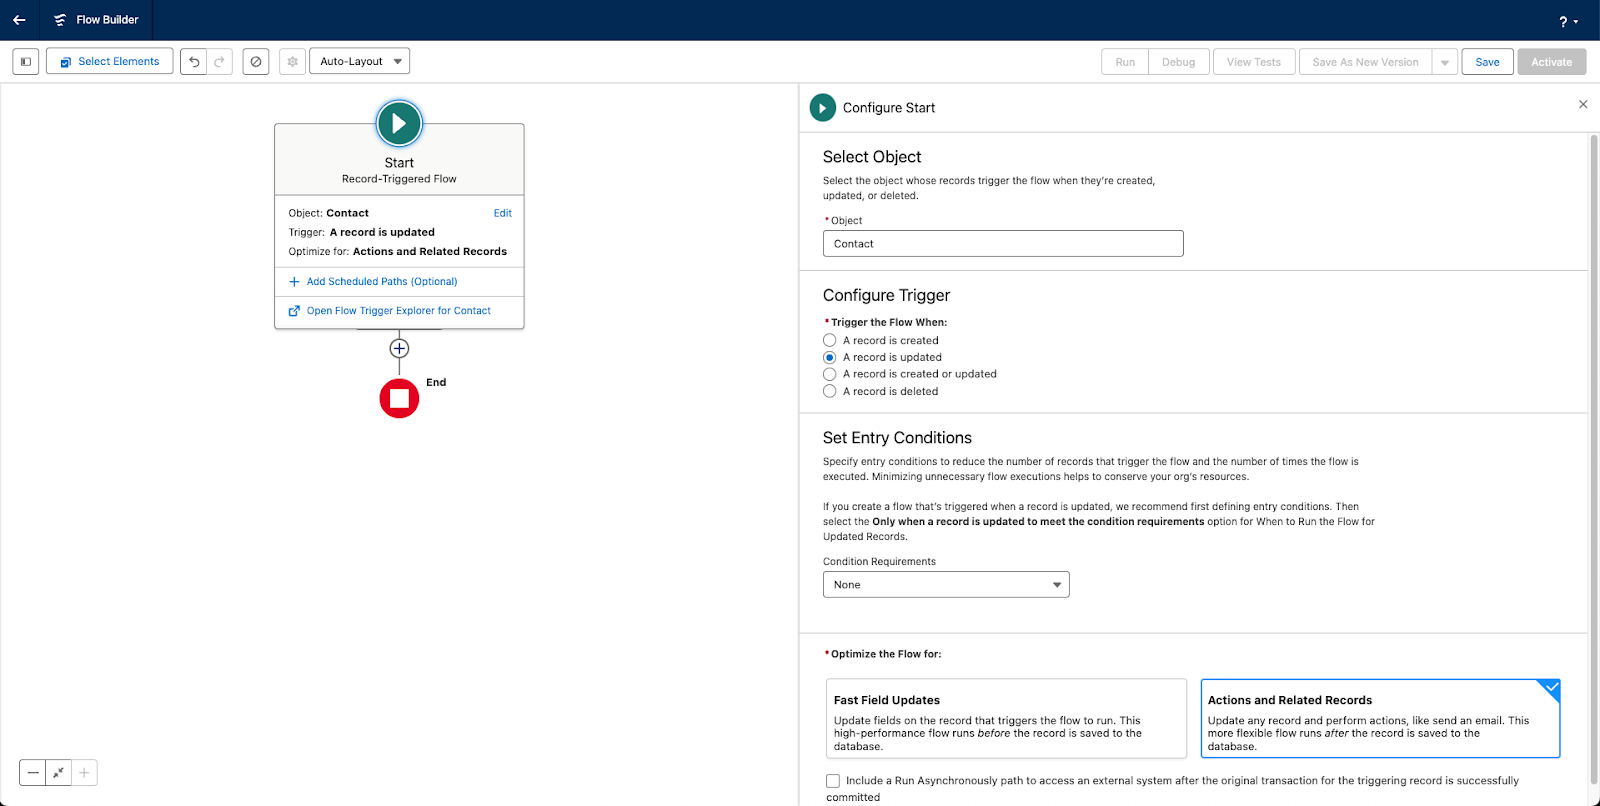
Configure the Flow trigger:
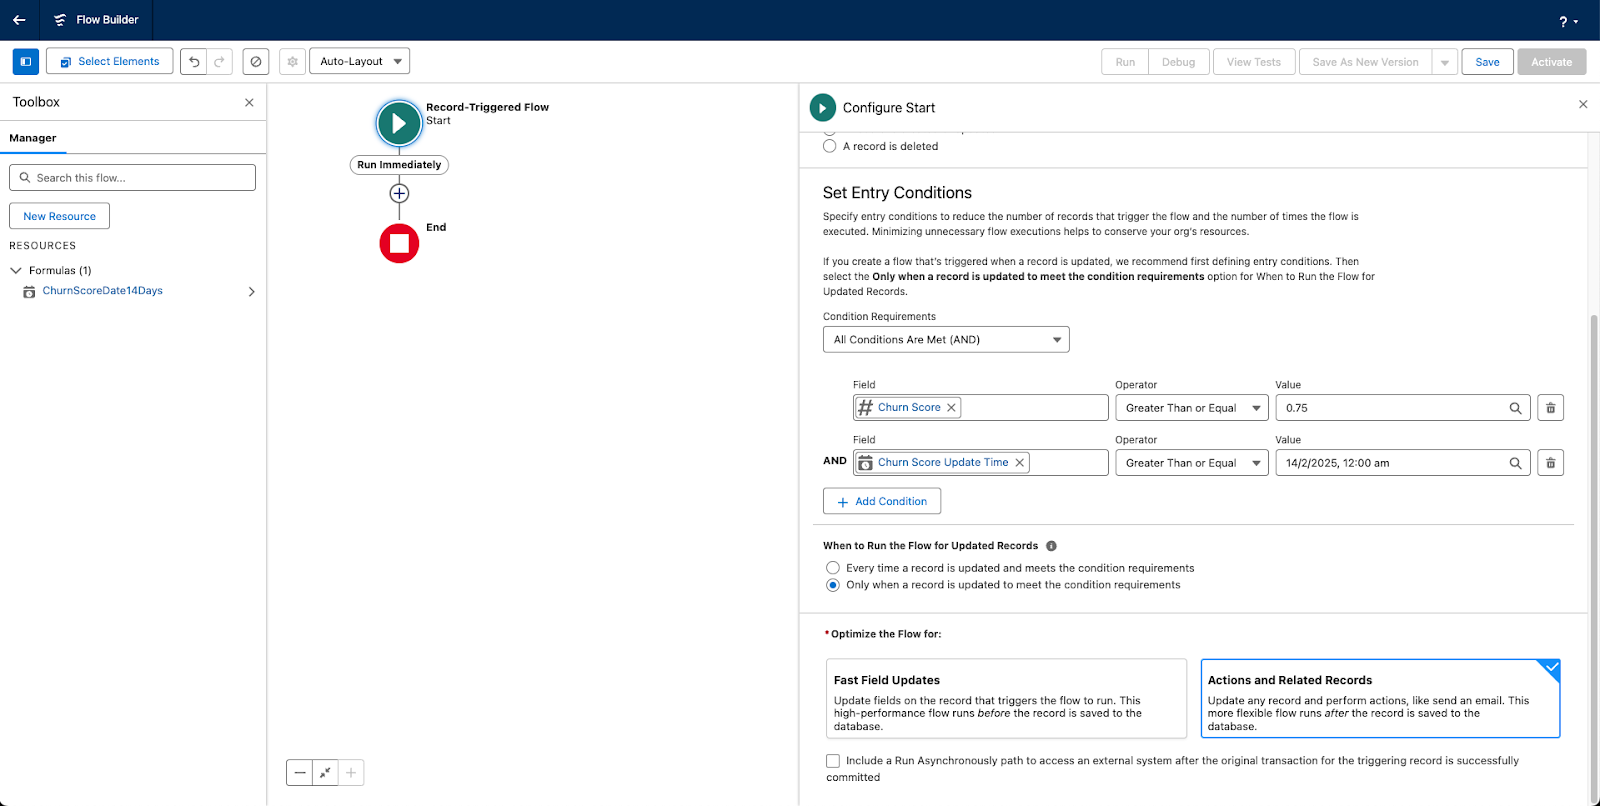
- Object: Contact
- Trigger the Flow When: A record is created or updated
- Set Entry Conditions: None (we'll set conditions in the next steps)
- Optimize the Flow For: Actions and Related Records
- Click "Done"
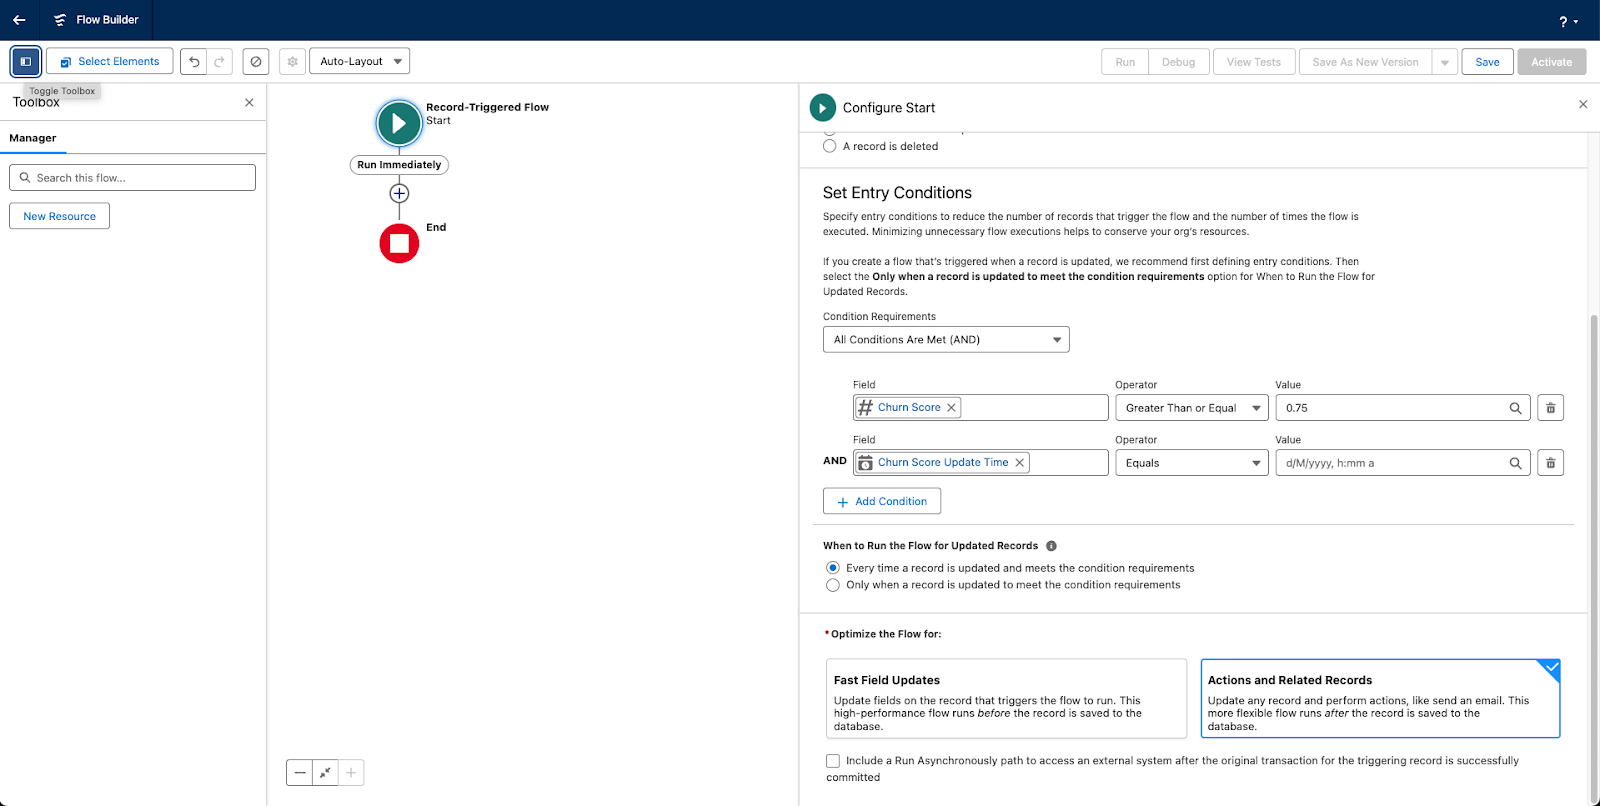
Set up the Flow conditions for high-risk customers:
- Click "Add Condition"
- Field: [Contact].upollo__ChurnScore__c
- Operator: Greater Than or Equal
- Value: 0.75 (adjust this threshold as needed for your business)
- Click "Done"
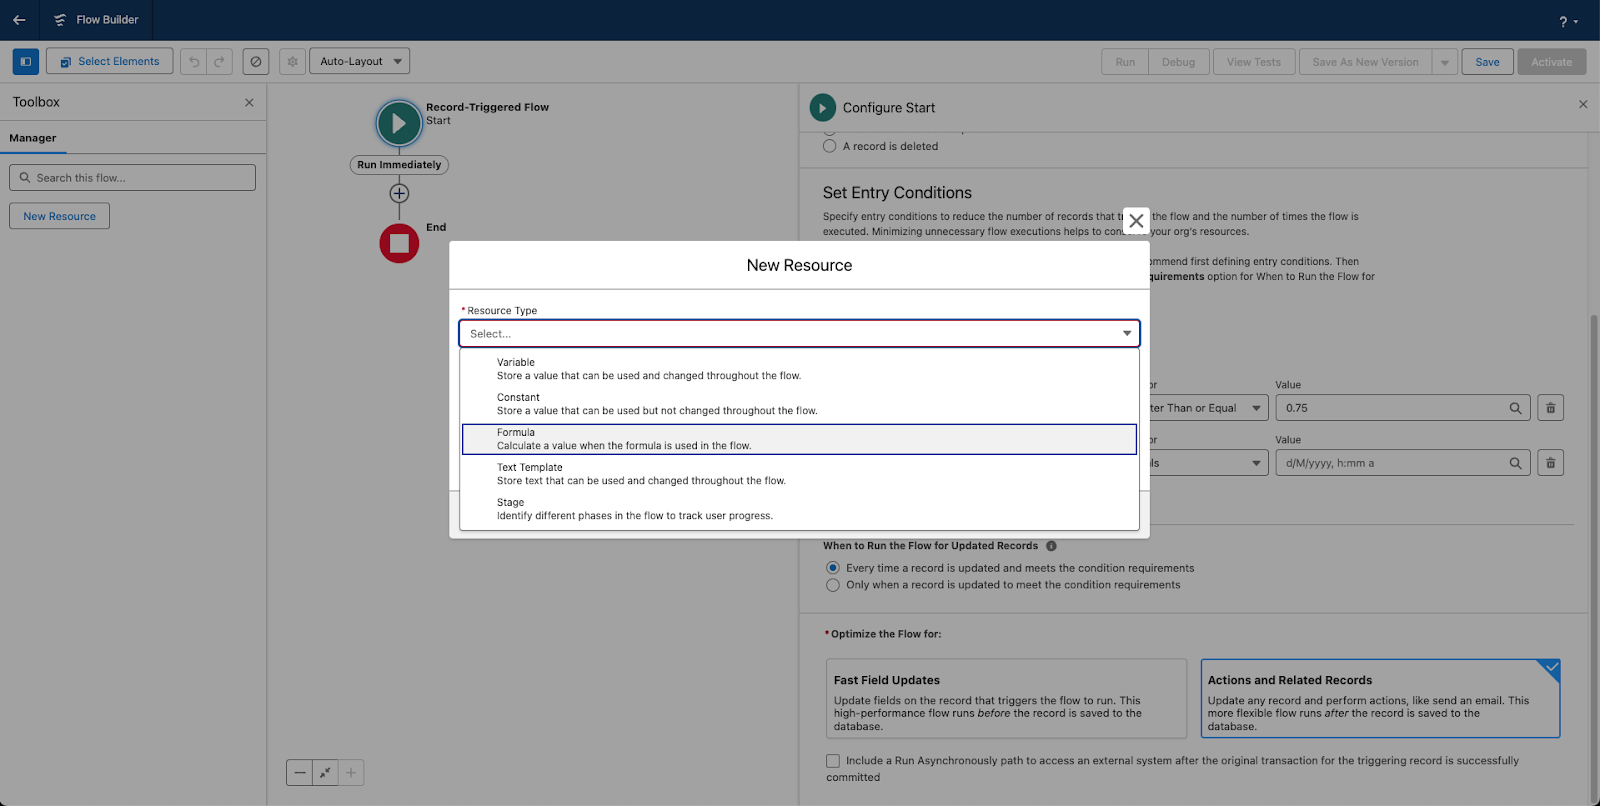
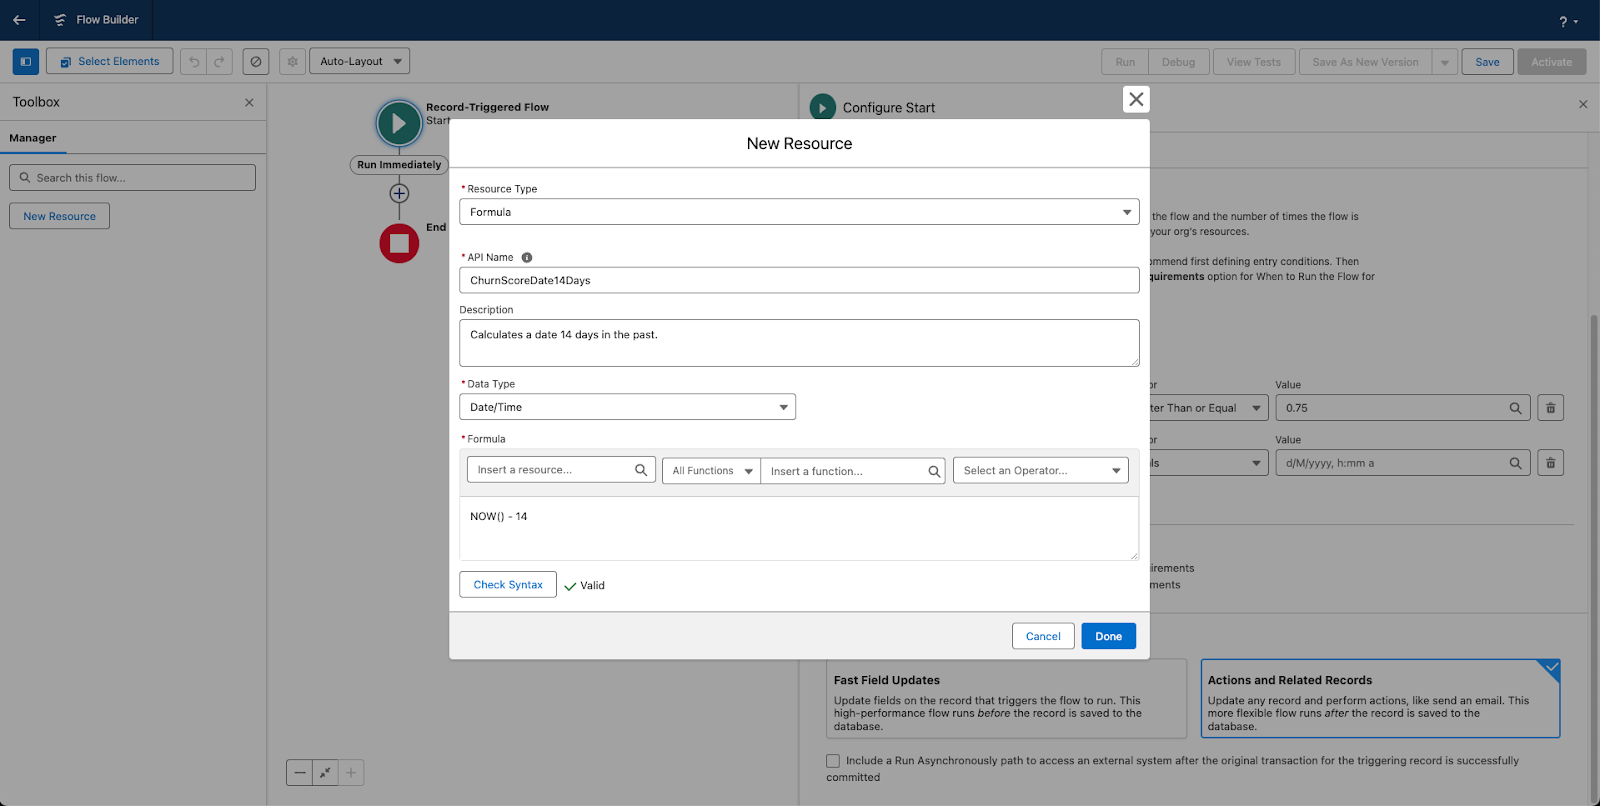
Create a Date/Time formula to check for recent updates:
- Click "Manager" tab
- Click "New Resource"
- Resource Type: Formula
- Data Type: Date/Time
- API Name: ChurnScoreDate14Days
- Formula: NOW() - 14
- Click “Check Syntax”. You should see a green check mark.
- Click "Done"
Add a second condition to ensure churn scores are recent:
- Click "Add Condition"
- Field: [Contact].upollo__ChurnScoreUpdateTime__c
- Operator: Greater Than or Equal
- Value: {!ChurnScoreDate14Days} (the API Name you created in the previous step)
- Click "Done"
Before we create a new task, we need to calculate a due date for Tomorrow. Click the "New Resource" button. In the New Resource window:
- Set Resource Type to "Formula"
- Set Data Type to "Date"
- Set API Name to "TomorrowDate" (or another descriptive name)
- In the Formula field, enter: NOW() + 1
- Click "Done" to save your formula
Your Resource should look like this:

Next, create a task for the contact owner:
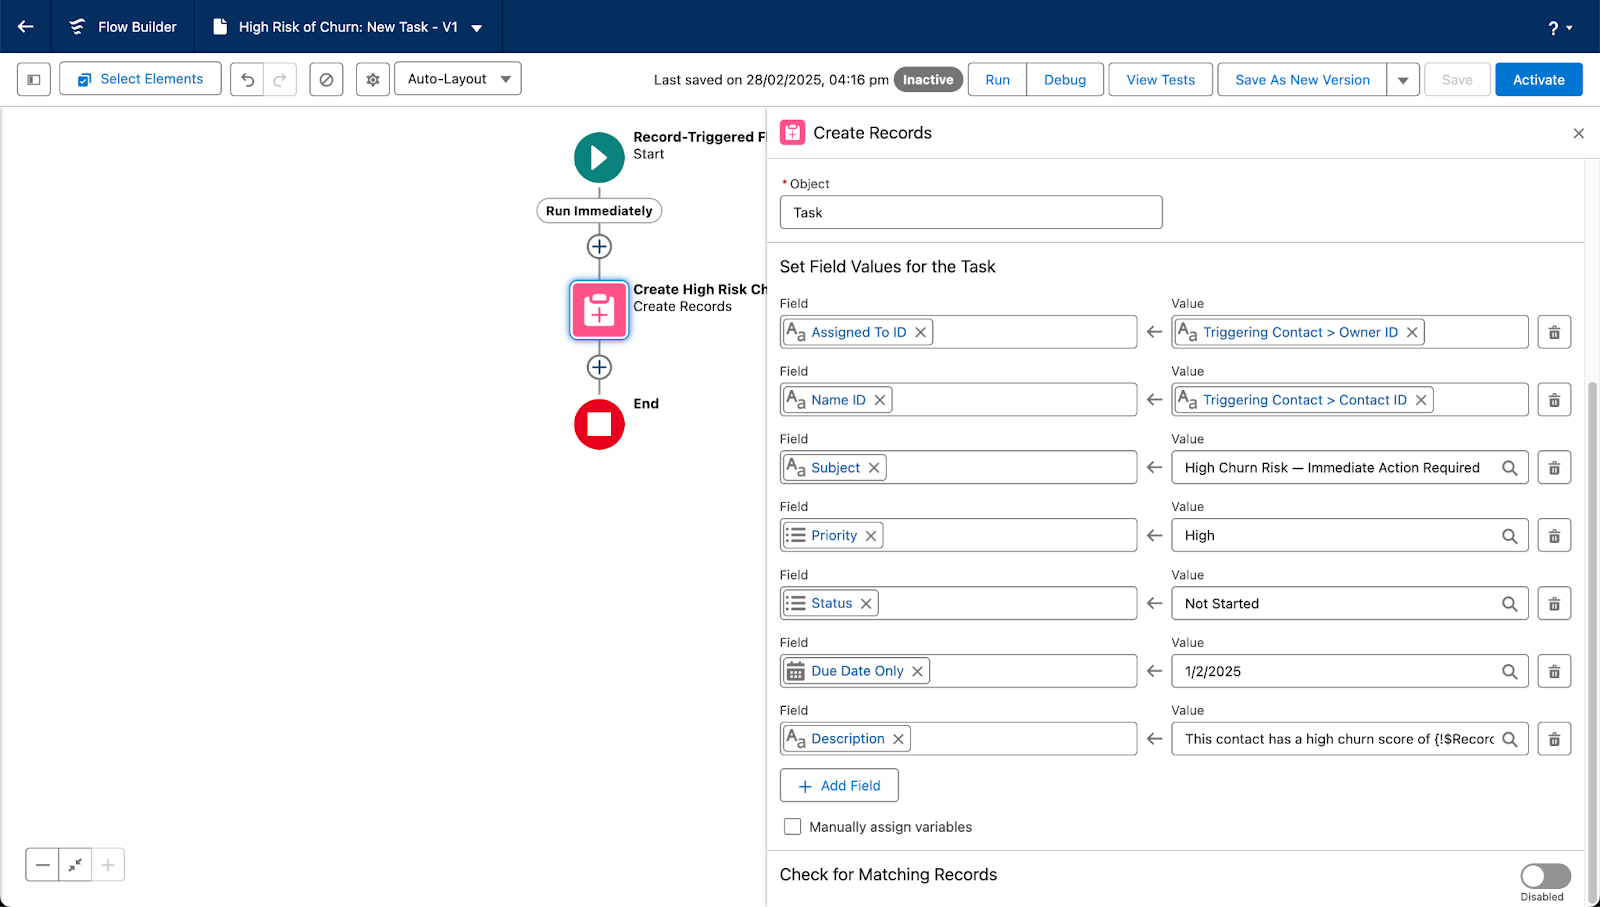
- Drag the "Create Records" element onto the canvas (or click the + icon beneath the Start Conditions)
- Label: Create High Risk Churn Task
- Record Type: Task
- How Many Records to Create: One
- Set field values:
- OwnerId: {!$Record.OwnerId}
- WhoId: {!$Record.Id}
- Subject: "High Churn Risk — Immediate Action Required"
- Priority: "High"
- Status: "Not Started"
- ActivityDate (Due Date): Select your formula resource by clicking the field and choosing {!TomorrowDate}
- Description: "This contact has a high churn score of {!$Record.upollo__ChurnScore__c}. Please reach out immediately to prevent customer loss."
- Click "Save”
Save and activate your flow:
- Click "Save"
- Enter Flow Label: "High Churn Risk Alert"
- Enter Flow API Name: High_Churn_Risk_Alert
- Click "Save" again
- Click "Activate"

With these steps complete, your team will be automatically notified when customers are at risk of churning, allowing for proactive intervention while there's still time to save the relationship.
This integration puts Upollo's powerful churn predictions directly into your team's existing workflow, making it easier than ever to retain valuable customers and grow your business.
Get this Play for Free
Automate your churn prevention, conversion, and expansion strategies

